We have several new projects underway for our Home Lab and the services it provides. We’re adding a Home Lab Blog to share current projects and information! We are doing this to help our readers follow our progress and learn about our projects.
We are also enabling our readers to comment on our Blog. This enables us to answer questions and allows our readers to shape the direction of our Home Lab.
Projects We Are Working On
We have several new projects that we are working on, including:
An enterprise-level upgrade to our Core Network that enables high-availability and expanded capacity in our core network and Internet connectivity
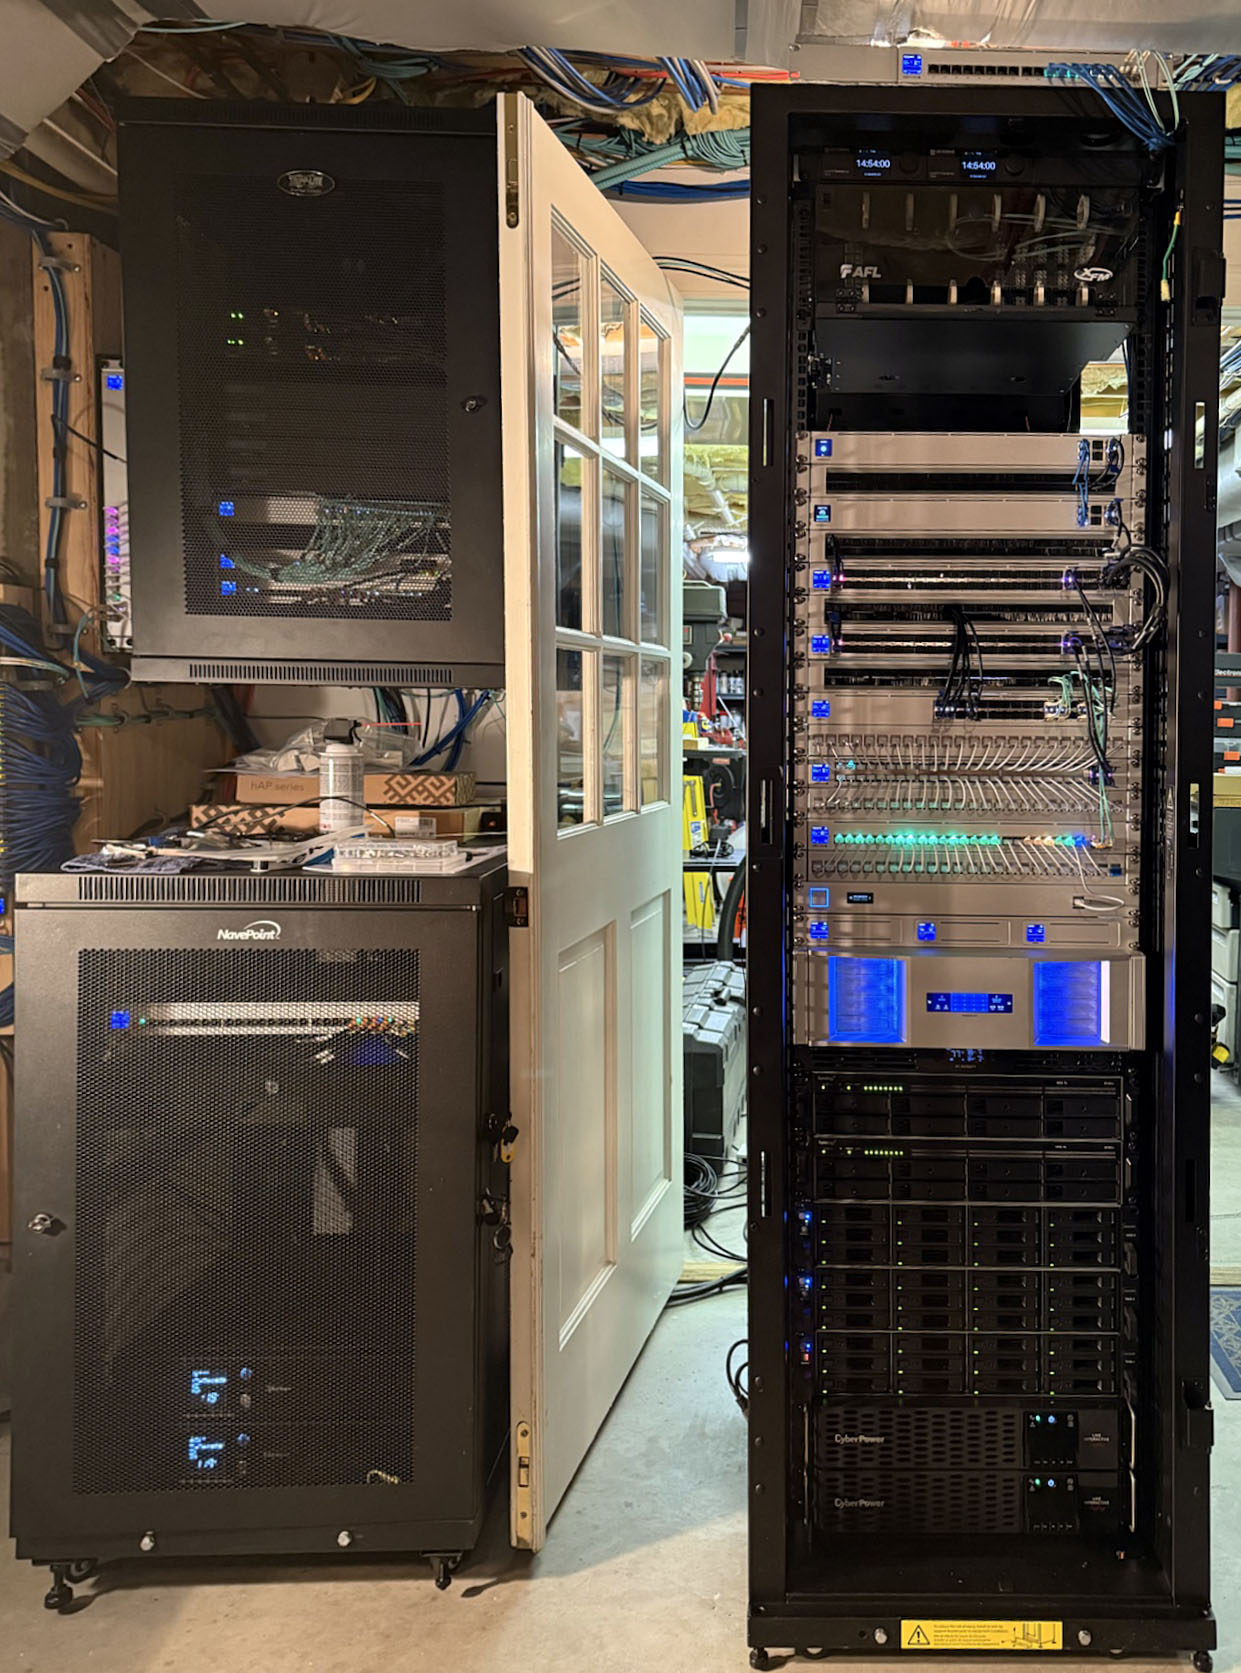
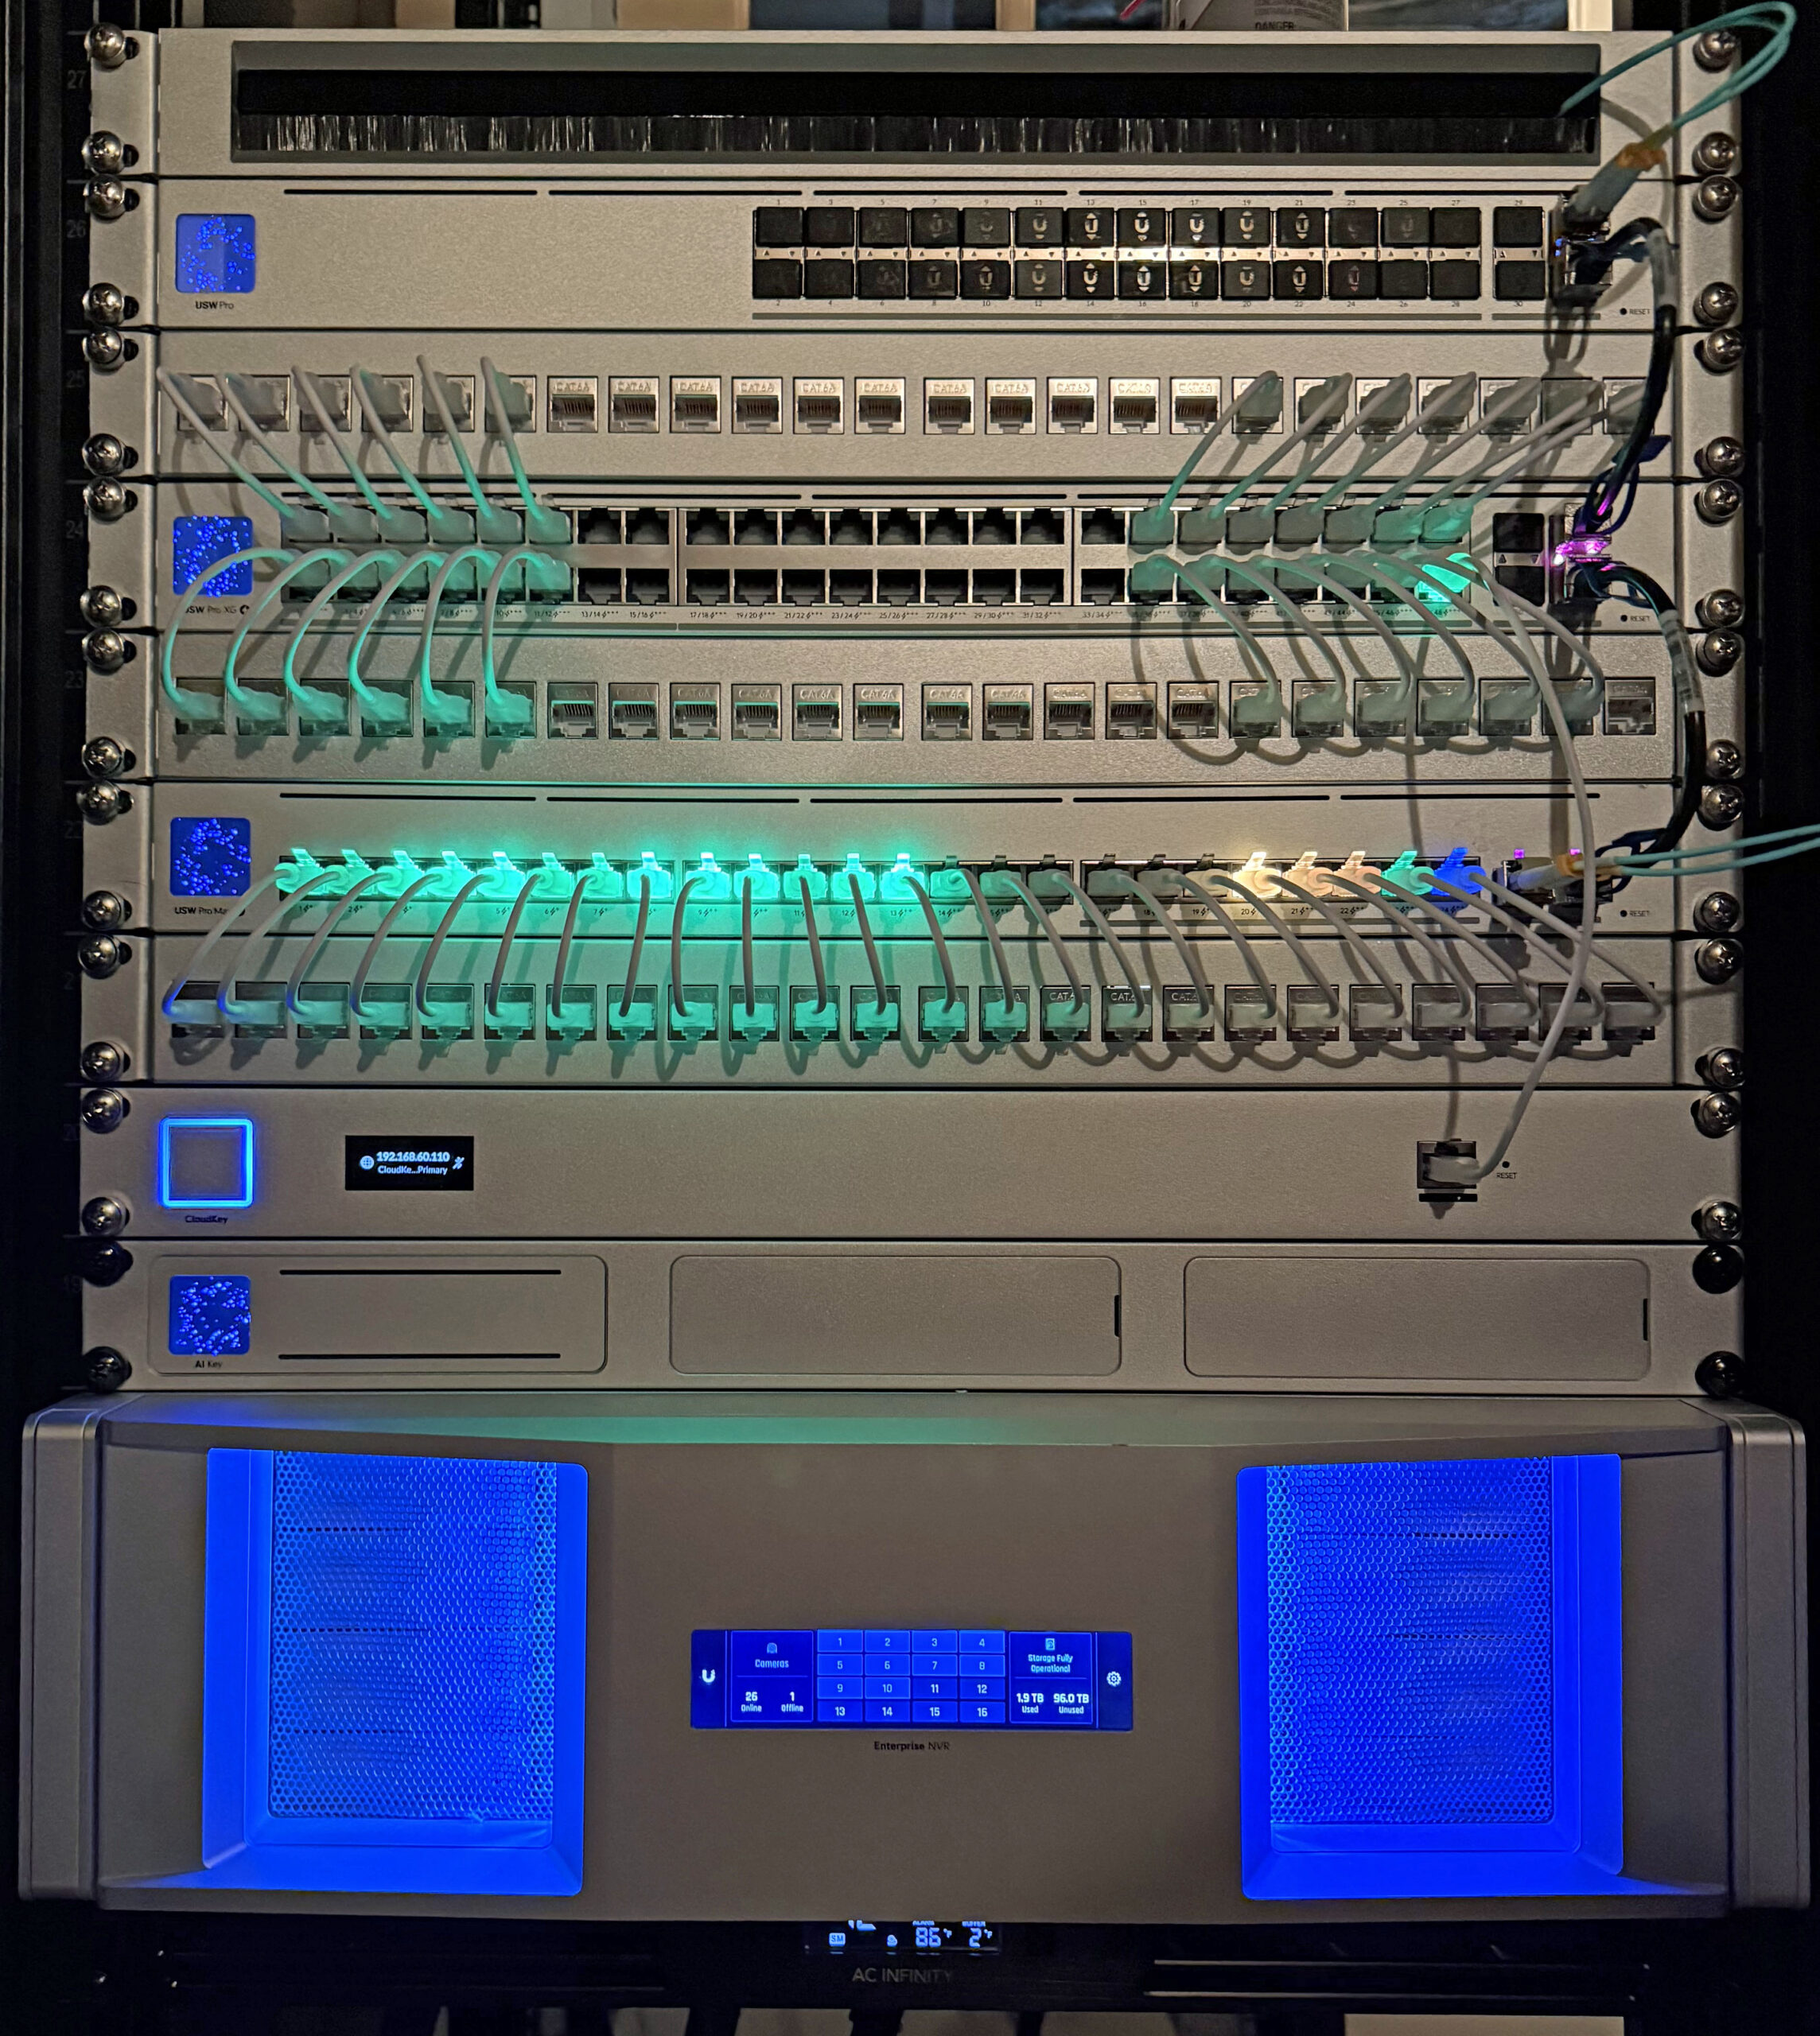
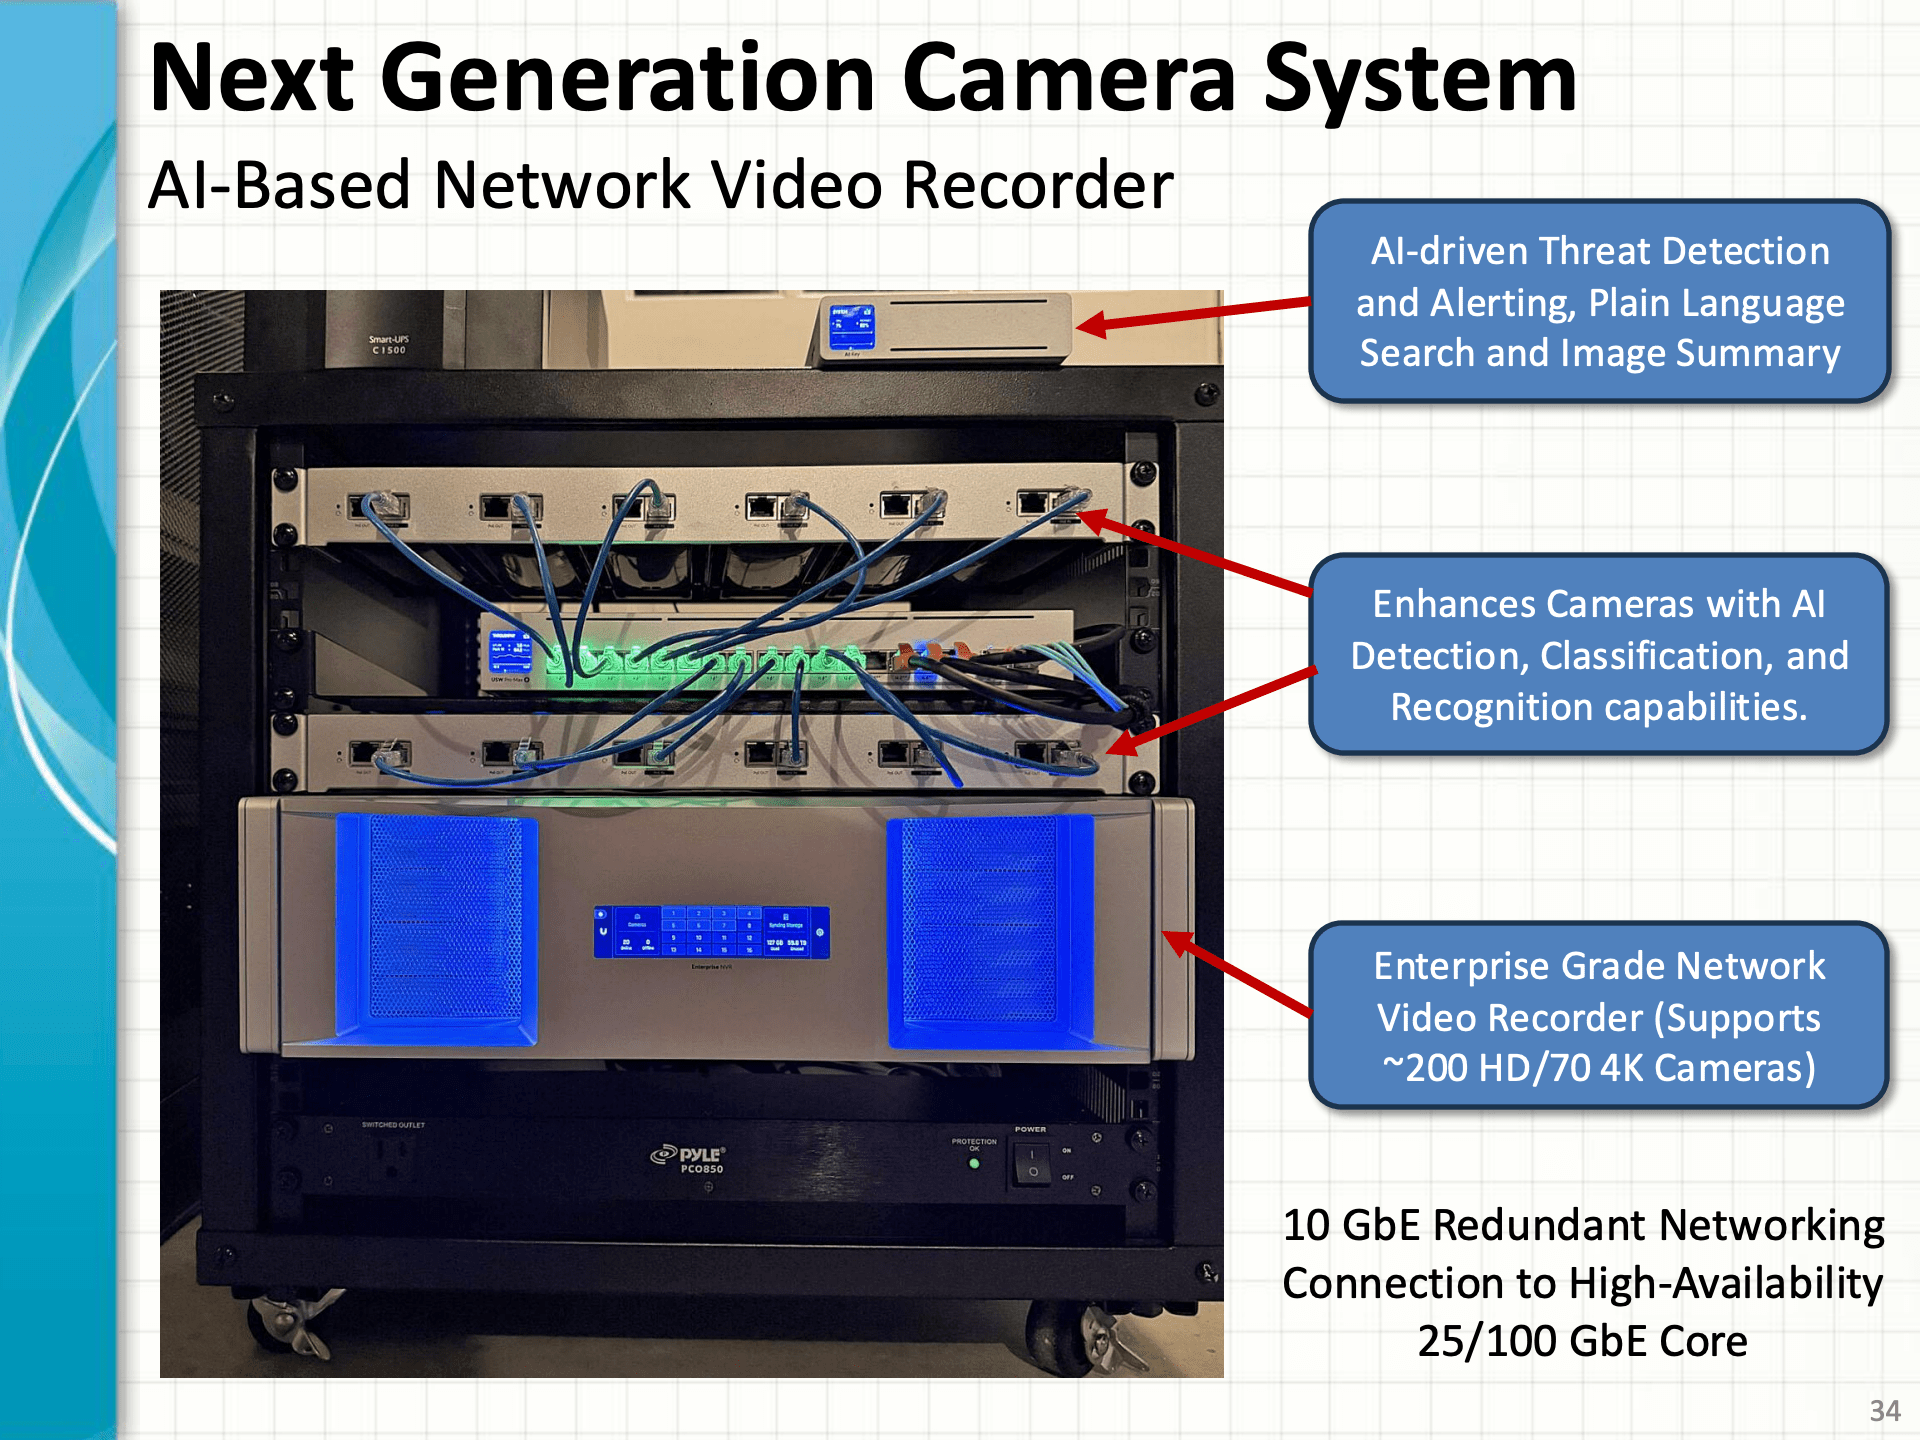
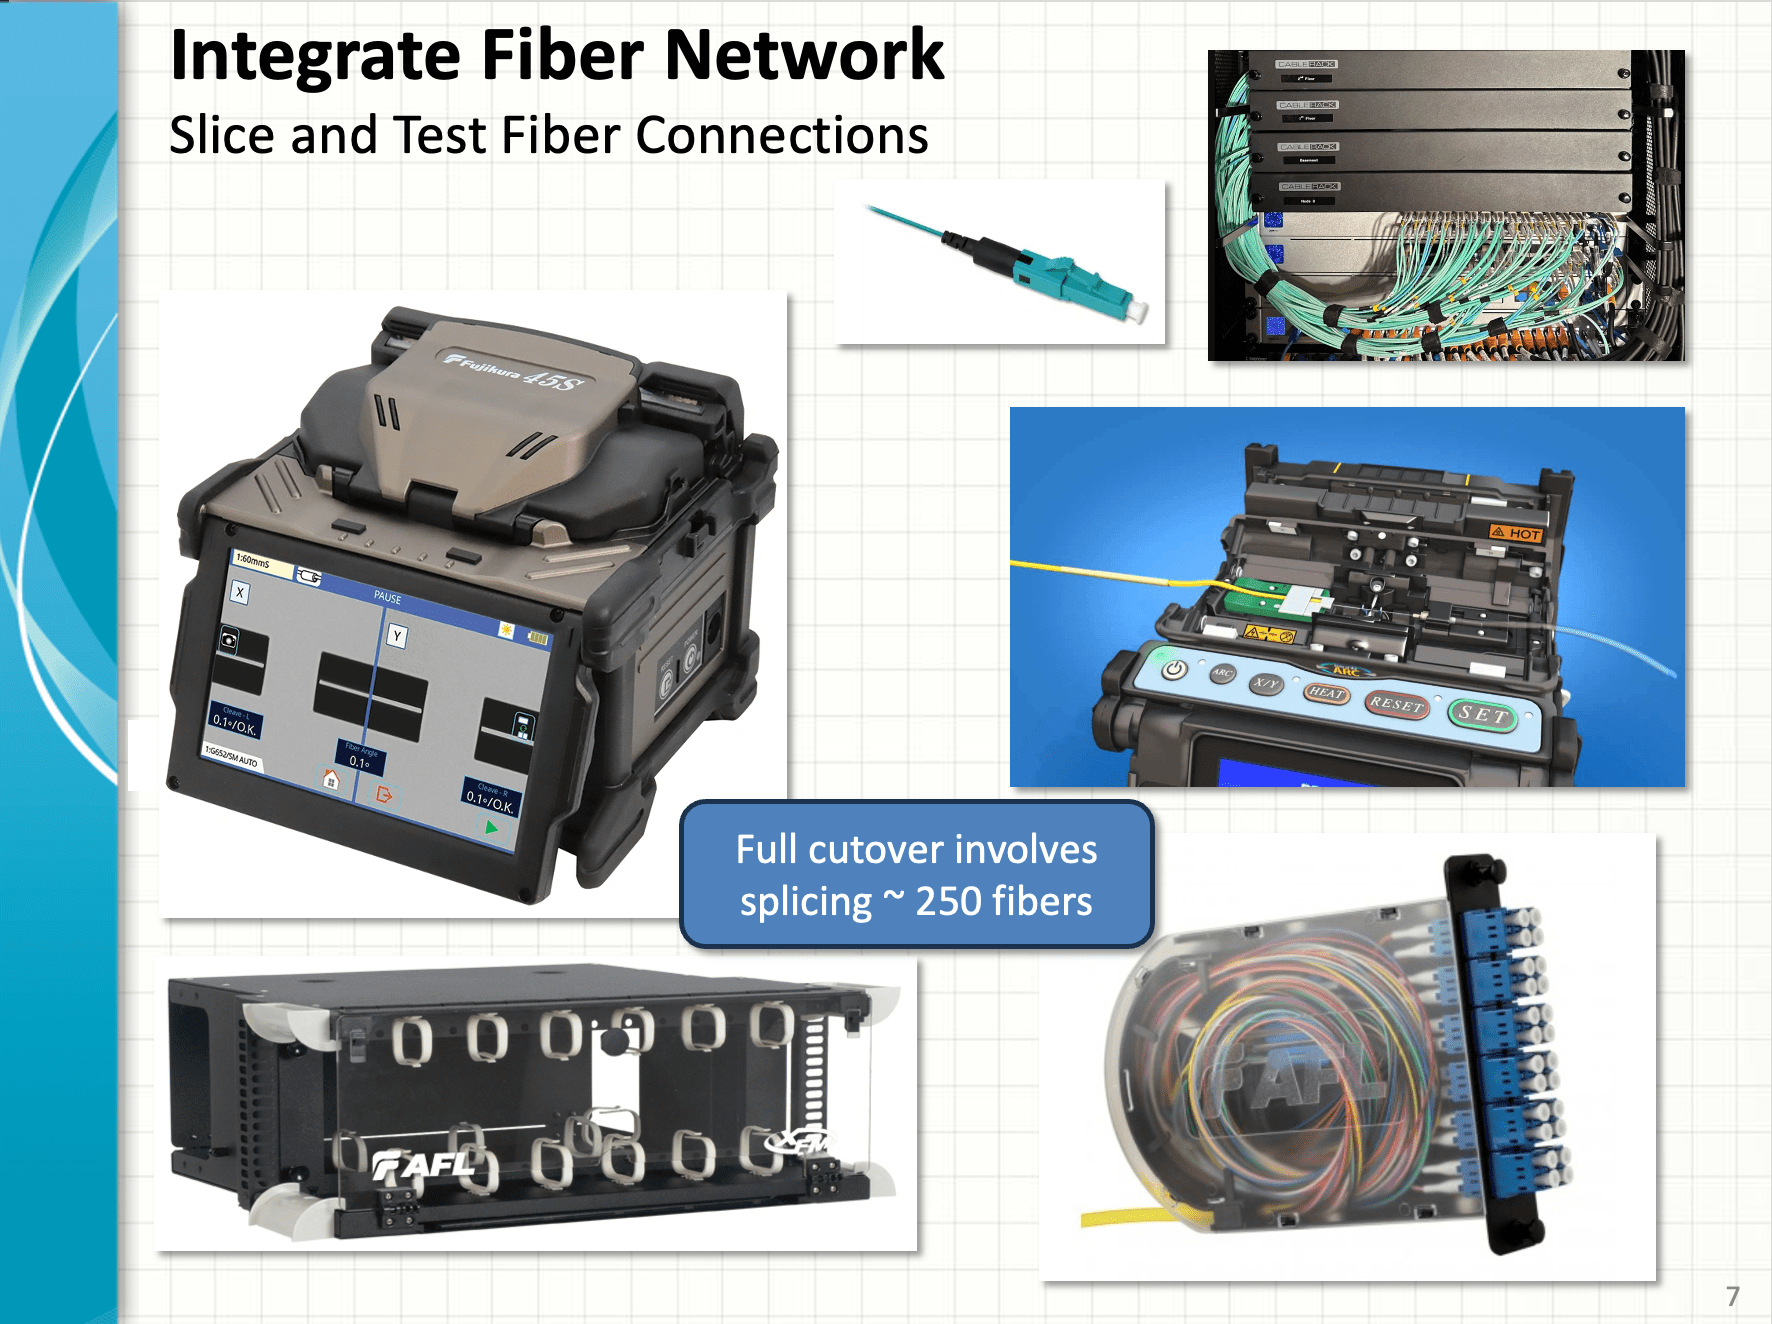
Here are a few images from our in-progress projects.
Enterprise-Grade Core Rack UpgradeHigh-Availability Enterprise-grade Firewall and AggregationNext Generation AI Camera SystemEquipment for Fiber Network Upgrades
We hope that you’ll check our Home Lab Blog often and follow/comment on our progress!
Our Unifi system can support several different VPN configurations. We used the VPN server built into our Unifi Dream Machine SE and configured it to use Wireguard clients on our iPhones, iPads, macOS laptops, and Windows laptops. The Unifi system makes setting up our WireGuard VPNs simple.
The following video explains the various VPN options and how to configure them.
We use DDNS to ensure that our domains point to our router when our ISPs change our IP address. After the clients are installed, they are updated to point at our network’s current IP.
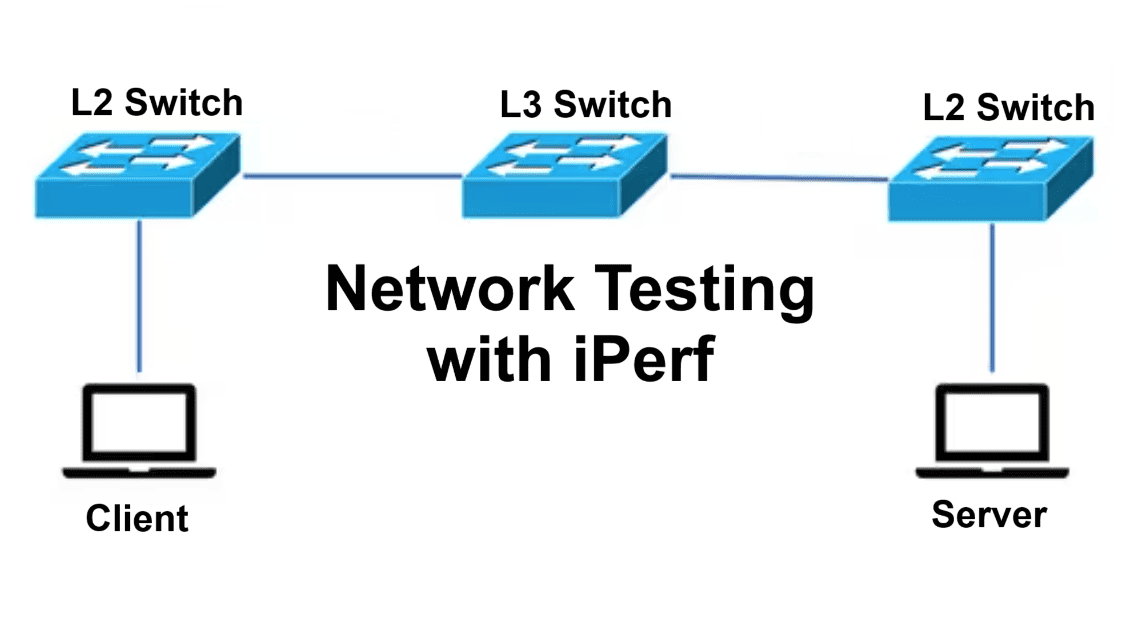
Iperf3 is a common tool for network performance testing. We run an Iperf3 server in a Docker container. You can find information on how to set up and use Iperf3 here.
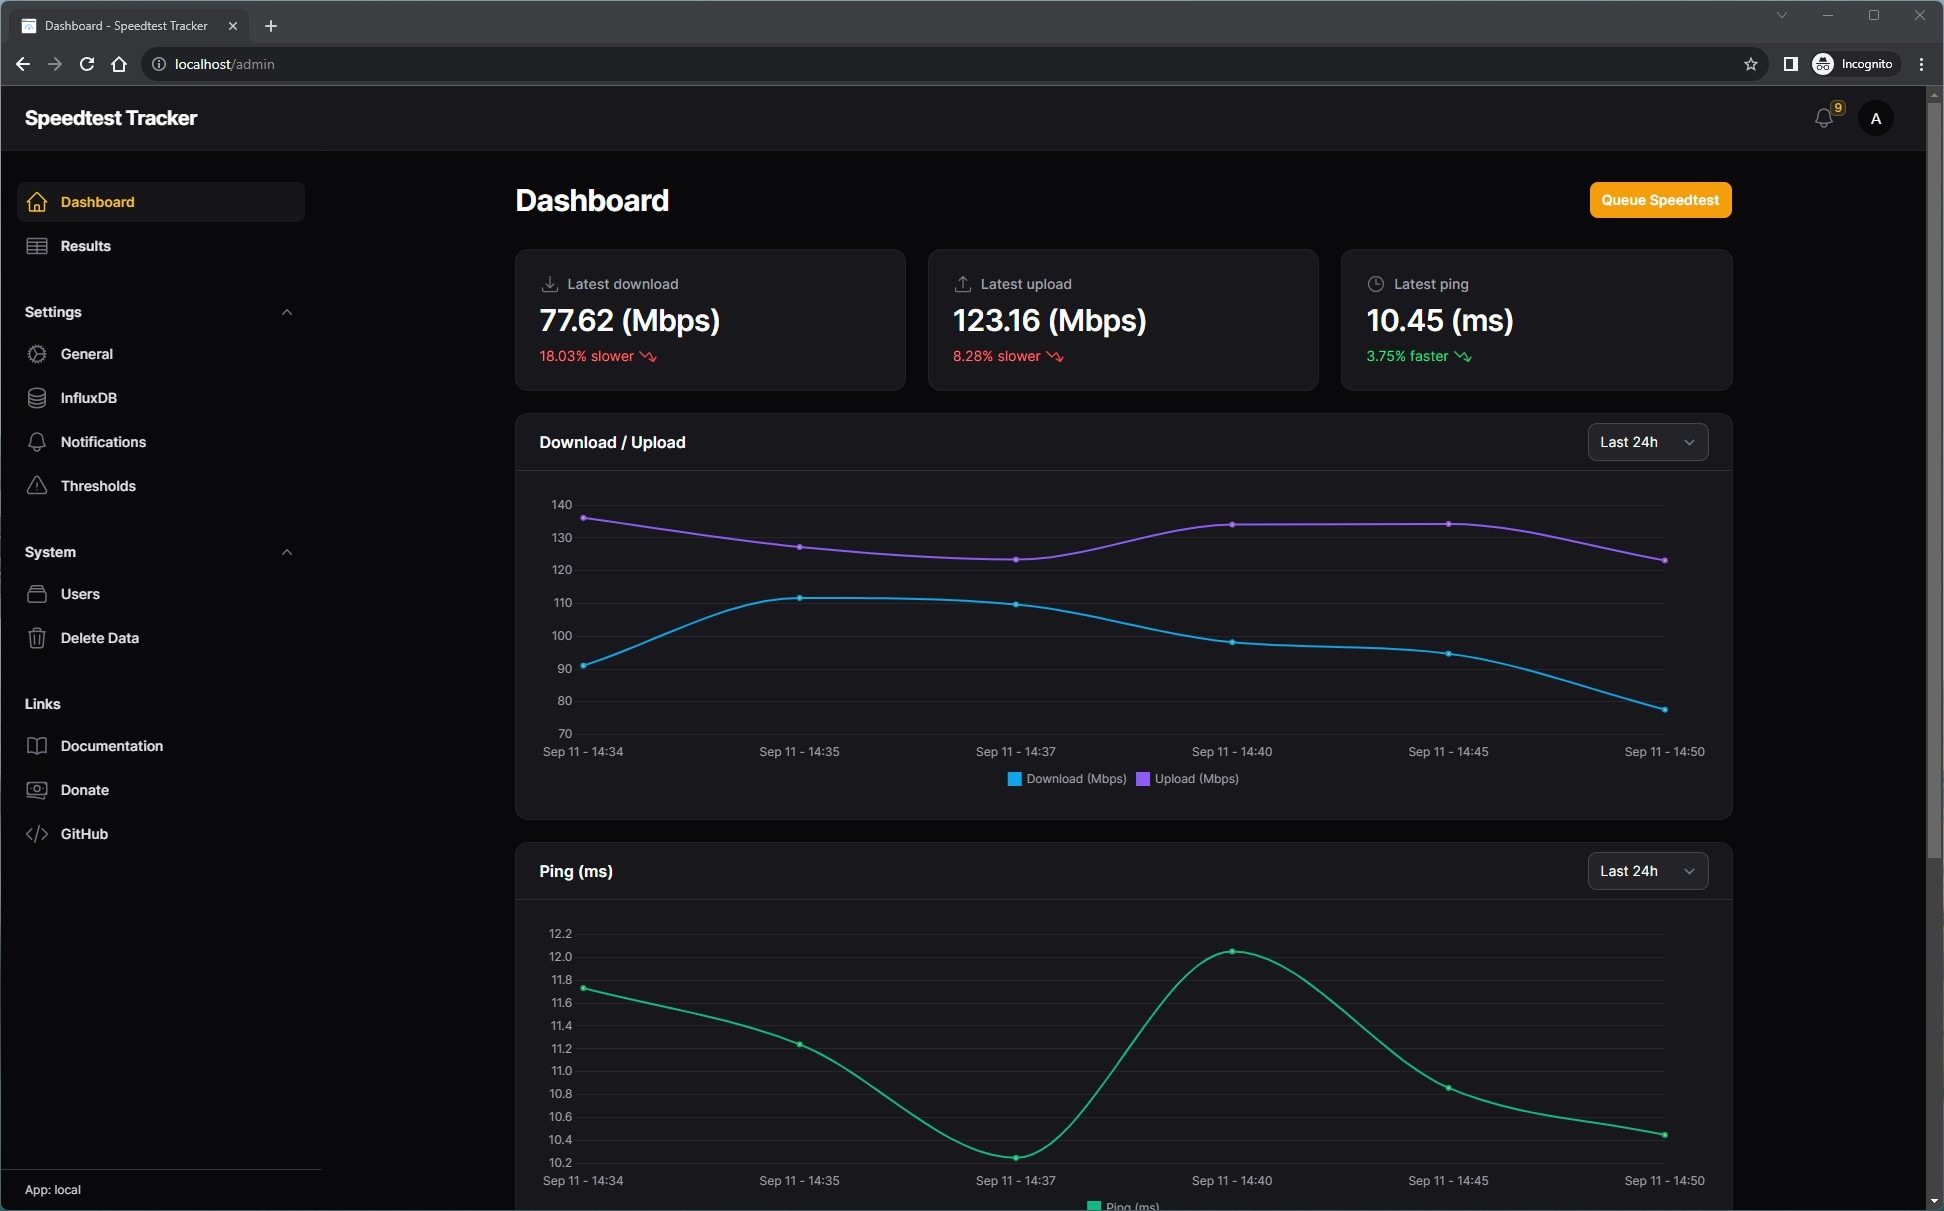
We run a Docker container called Speedtest Tracker to monitor the performance of our Internet connection. This container is a self-hosted application that monitors the performance and uptime of our internet connection. It uses test servers on the Internet to measure our Internet upload and download speeds, latency, and jitter. The main use case for this tool is to build a history of your internet performance and ISP’s uptime so you can be informed when you’re not receiving your ISP’s advertised rates.
Setup and Configuration
This container is easy to set up in Docker. We used the process in the video below –
We also configured the container to store test results in our Influxdb.
Speedtest Tracker Grafana Dashboard
This allows us to configure a Grafana Dashboard to view the results of our tests.
Speedtest Tracker Results
The Grafana Dashboard that we used can be found here. You can learn more about how we have deployed and configured Grafana dashboard in our Home Lab here.