We want to generate images locally. Several different applications can do this. To get started, we choose Stable Diffusion WebUI. This tool provides both text-image and image-image generation capabilities.
The WebUI part offers a user interface. Users can select image generation models, set up these models, and generate images from text.
# Location where AI tools are installedcd~/AI/stable-diffusion-webui# Log startup of Stable Diffusionecho"*** Launching Stable Difussion at `date` ***" >> ~/AI/ai.log# Run Stable Difussion using login/password; enable API./webui.sh--api--listen--gradio-auth <uid>:<password> >> ~/AI/ai.log
Basg Script to Launch Stable Diffusion
We also used the Mac Automator to launch it when logging in.
The final step is to allow access to the WebUI via a proxy host, our Nginx Proxy Manager.
Choosing and Downloading Models
Once Stable Diffusion is installed, you’ll want to download models to generate images. A good source for models is Hugging Face. Here’s a guide to choosing models. We have these models installed here –
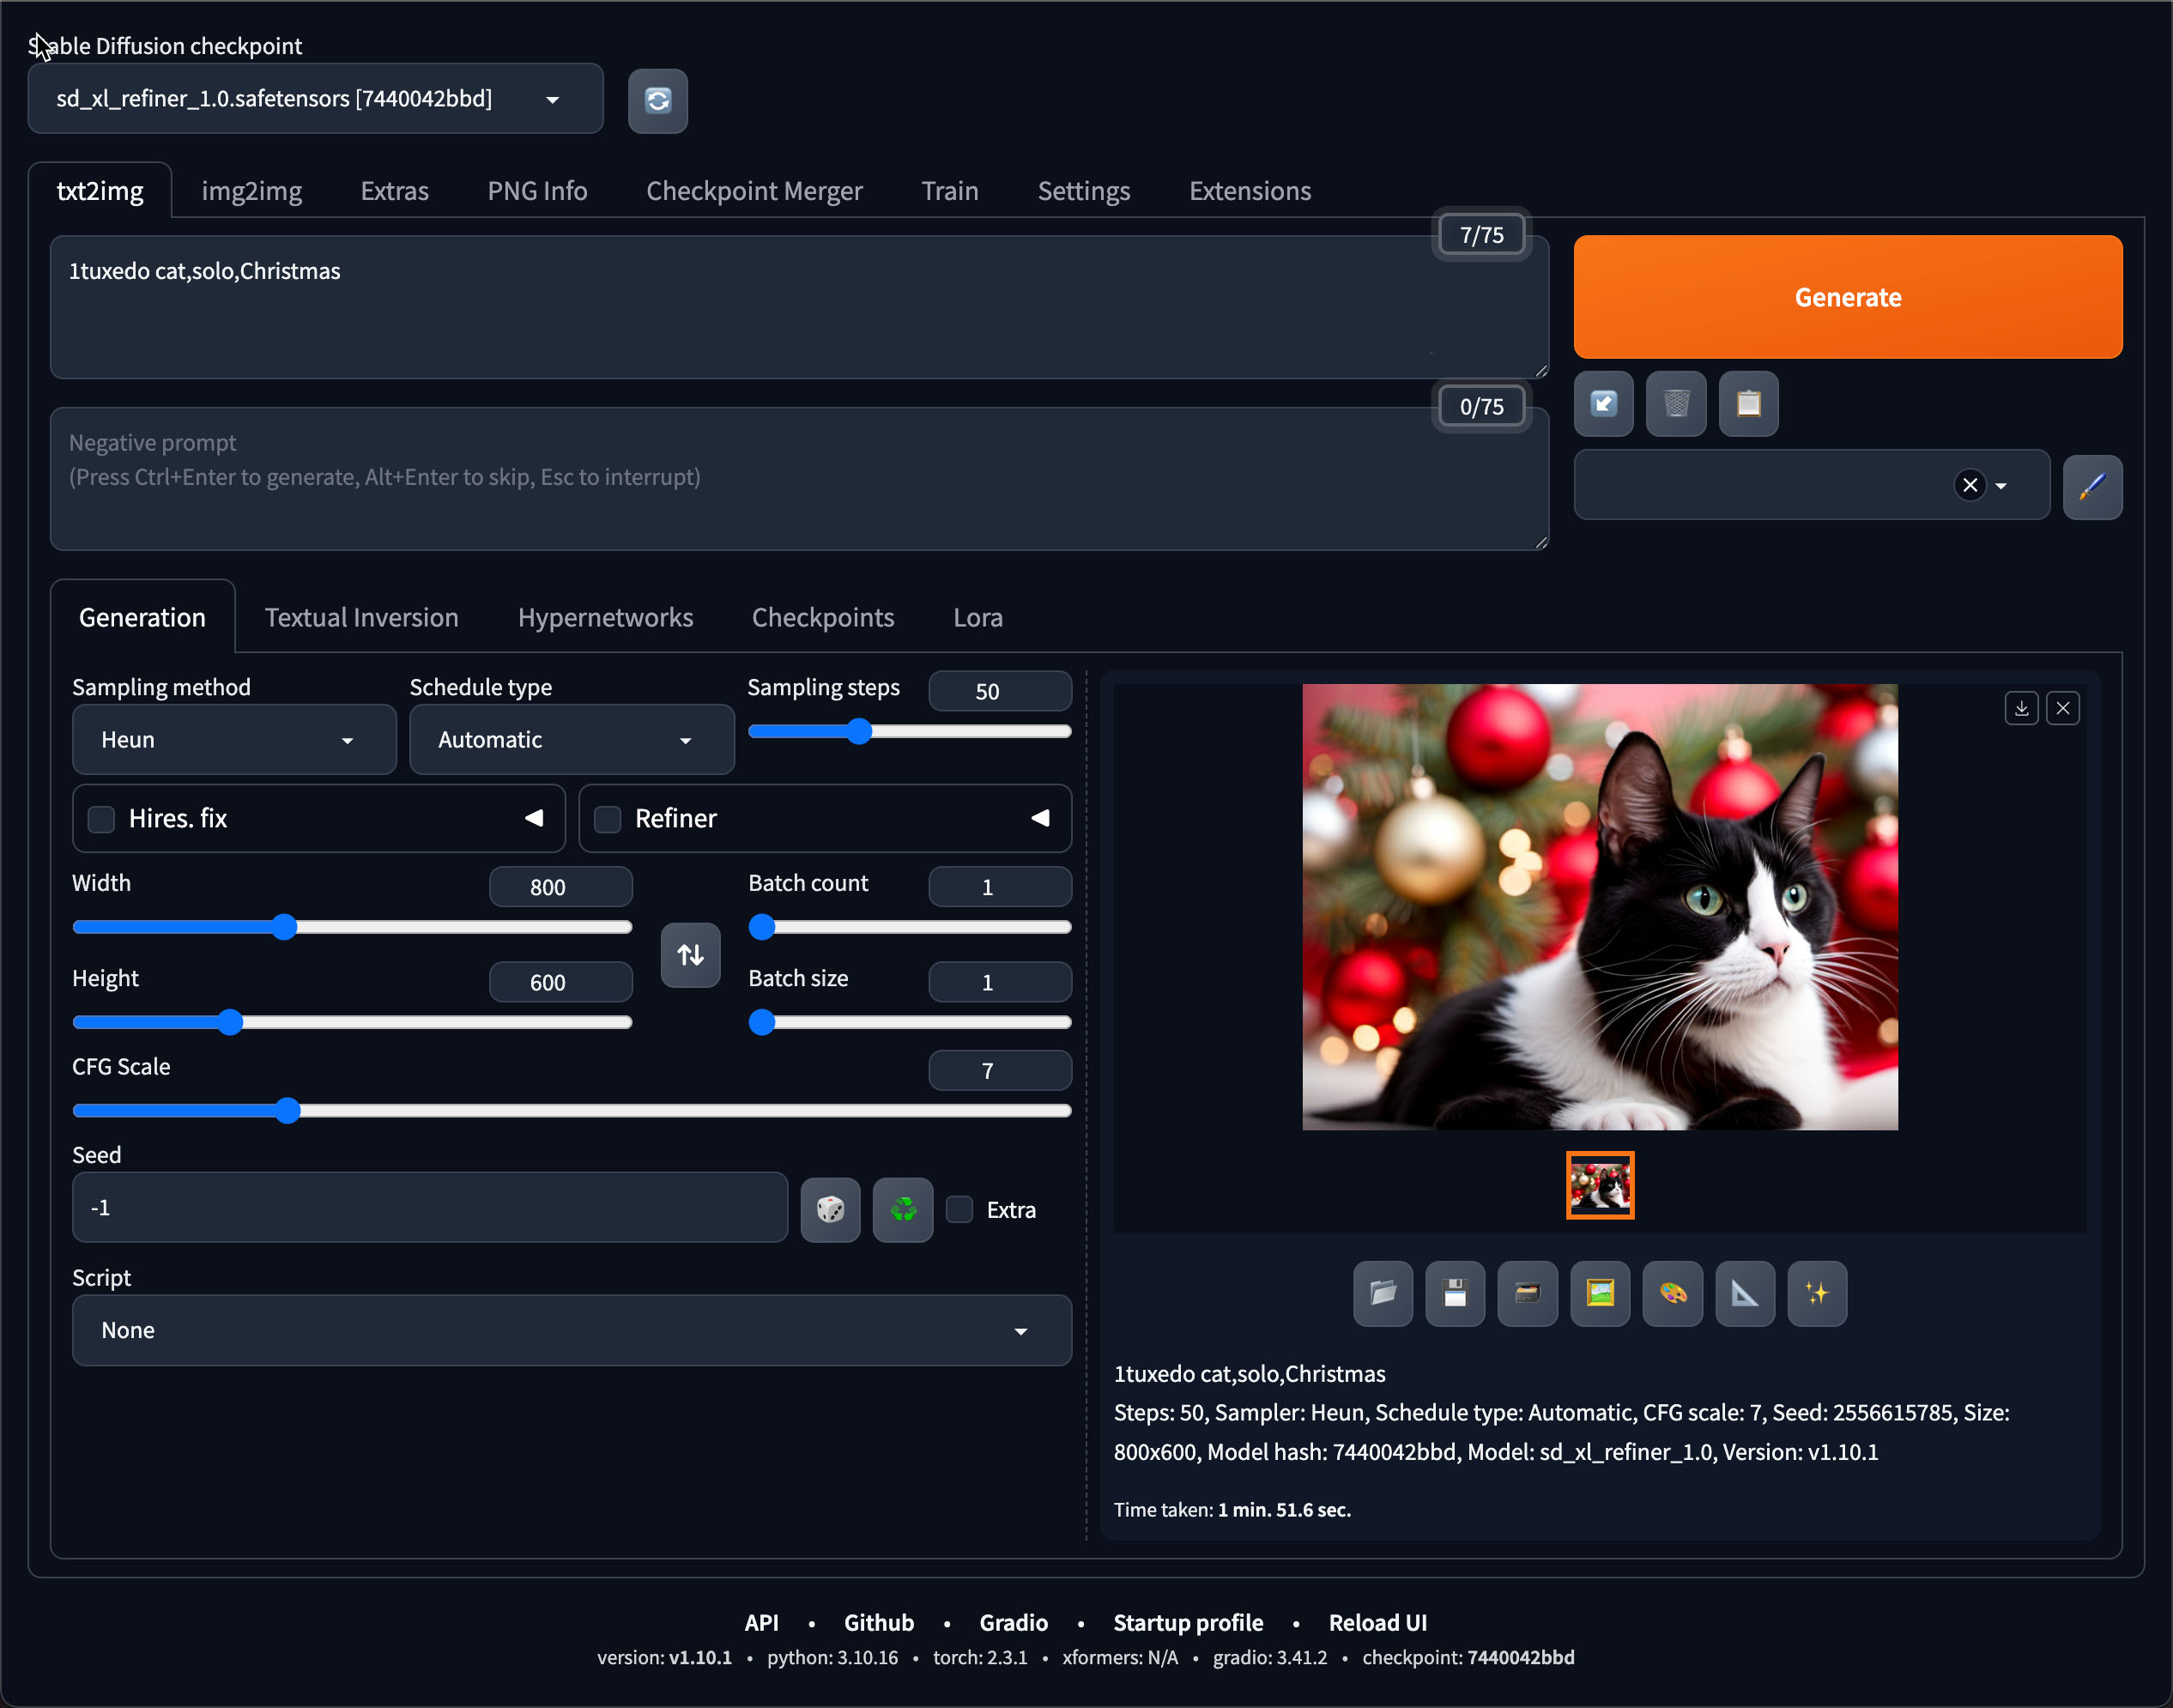
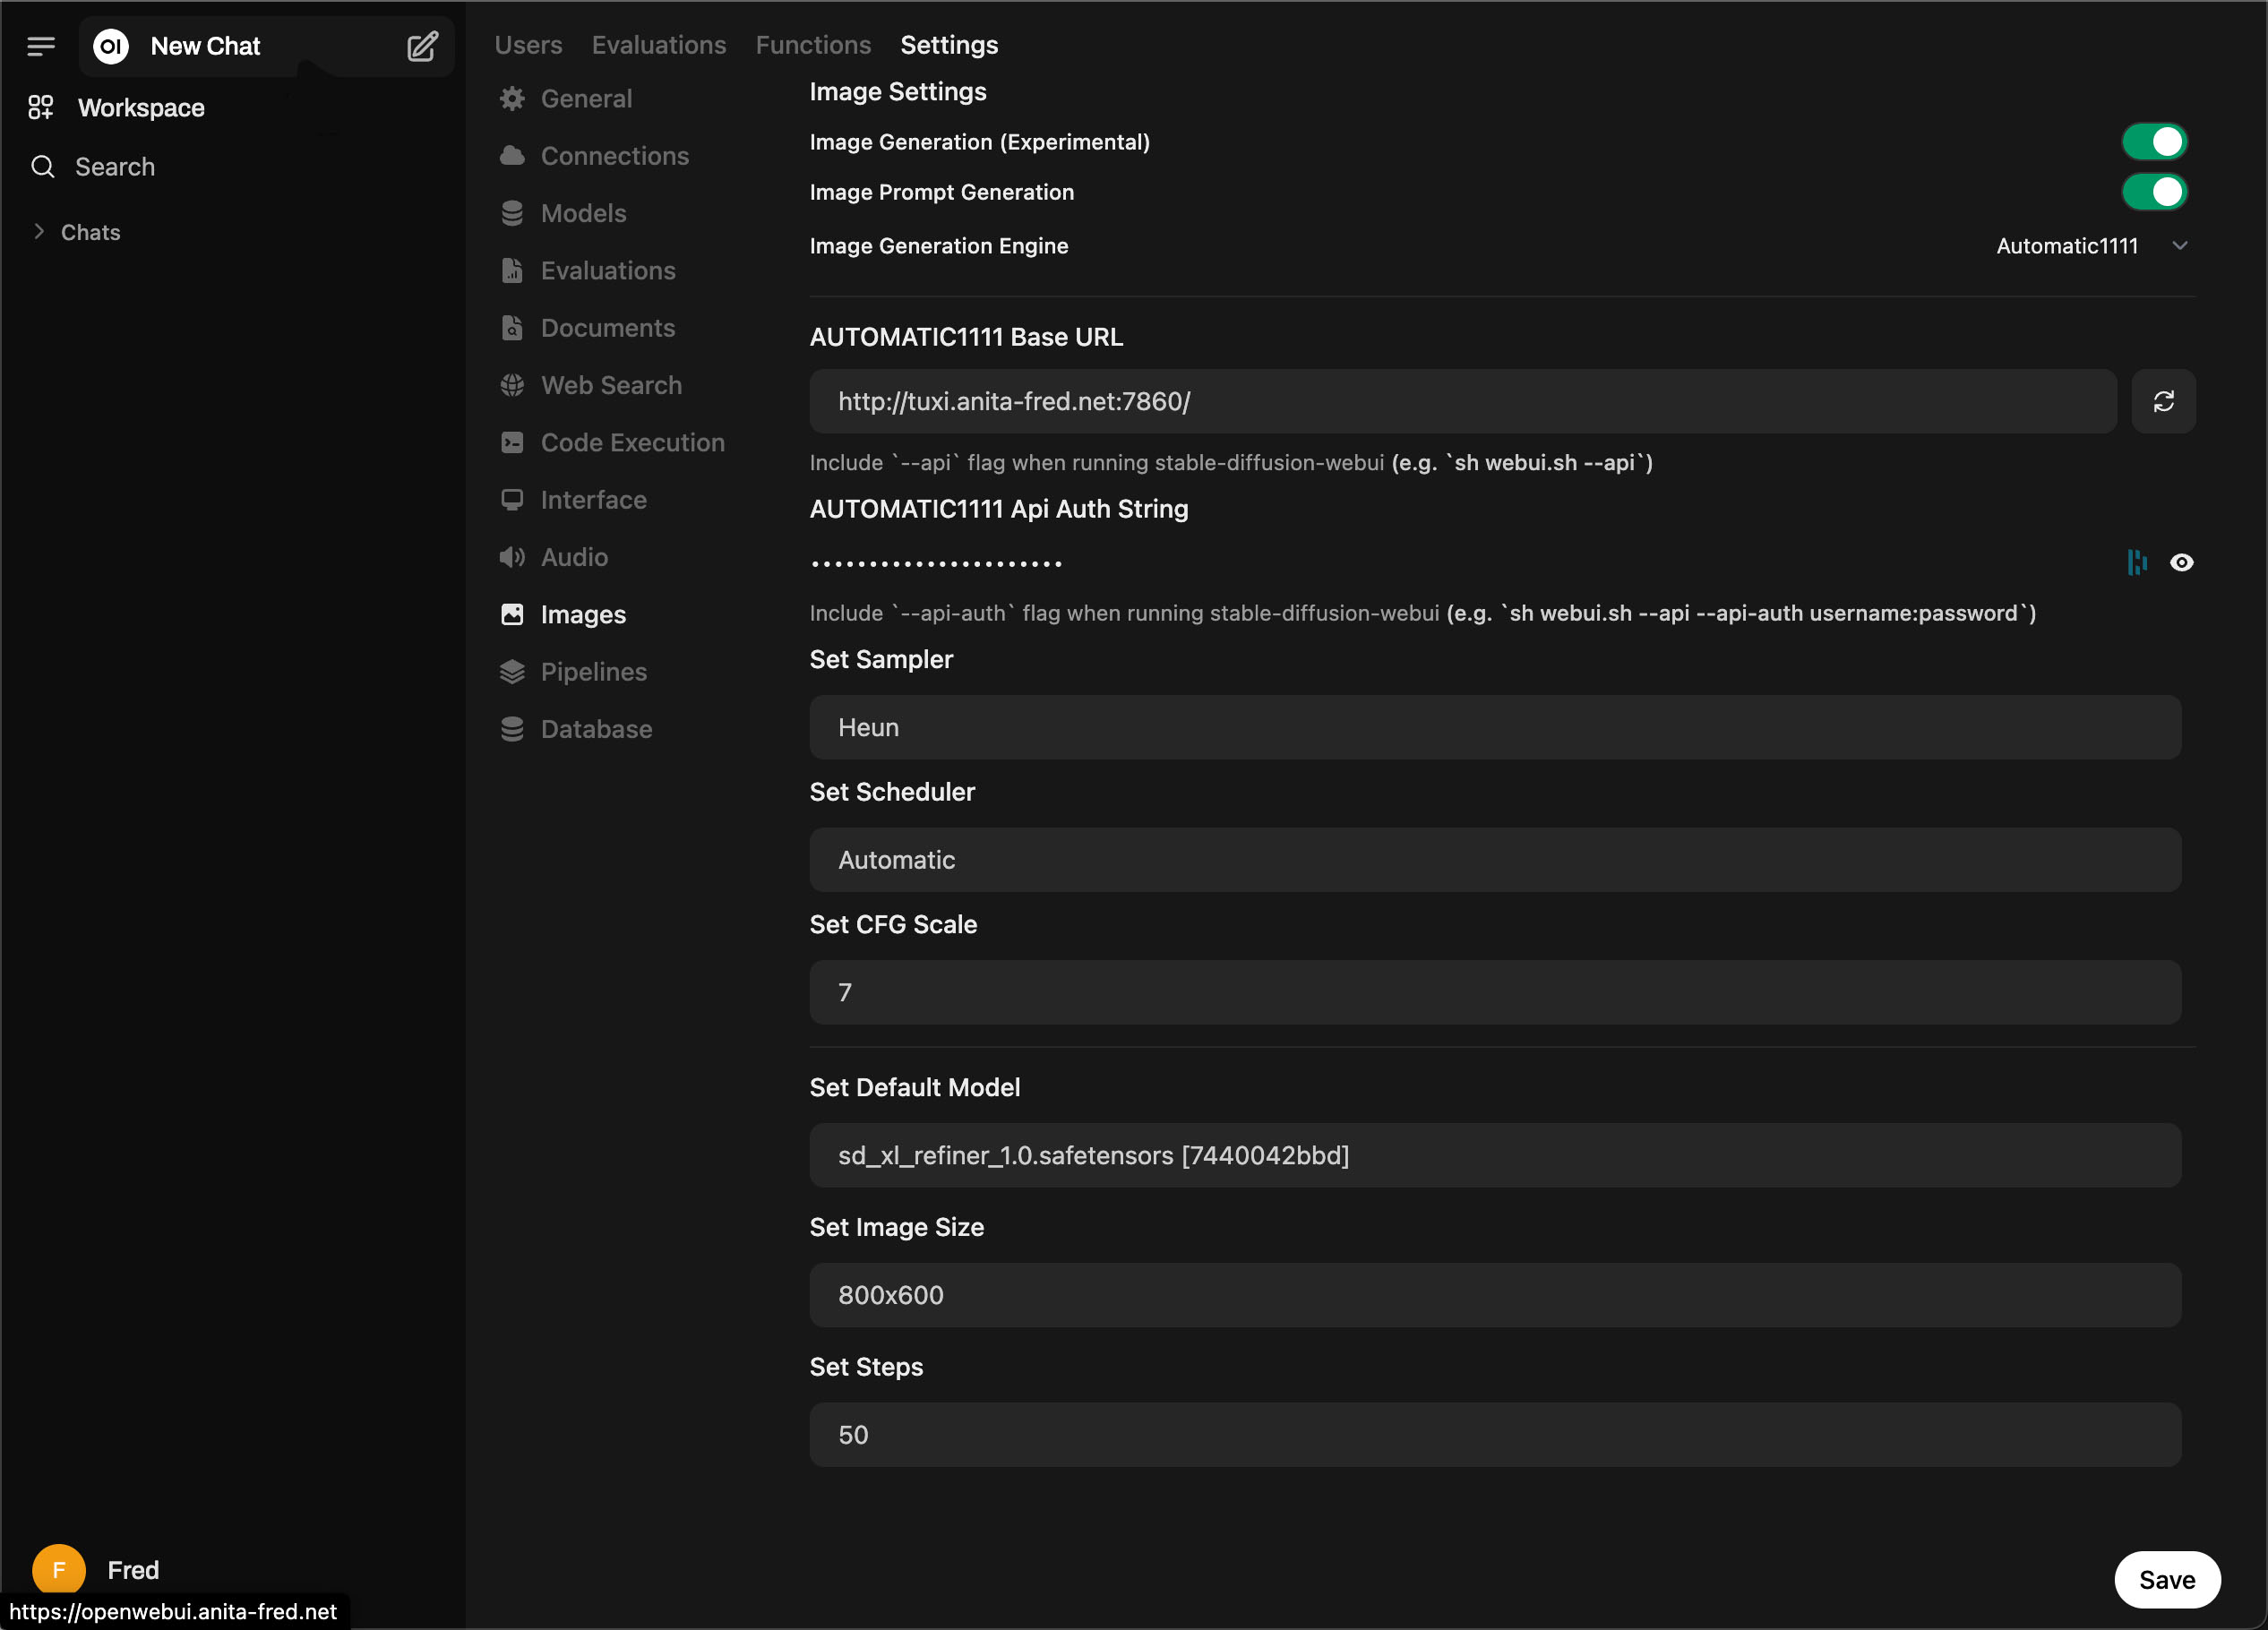
The quality and look of the images you can generate using Stable Diffusion are endless. You can control how your images look and their content through the choices that you make in –
Heun Sampler – A high-quality image convergence algorithm
CFG Scale is set to 7 – sets how closely the image prompt is followed during image generation.
Image Size is 800×600 – the size of the images in pixels.
Steps is set to 50, which is the number of steps used to refine the image based on your prompt.
You can experiment with these settings using the Stable Diffusion WebUI. This will help you find a combination that produces good results on your setup.
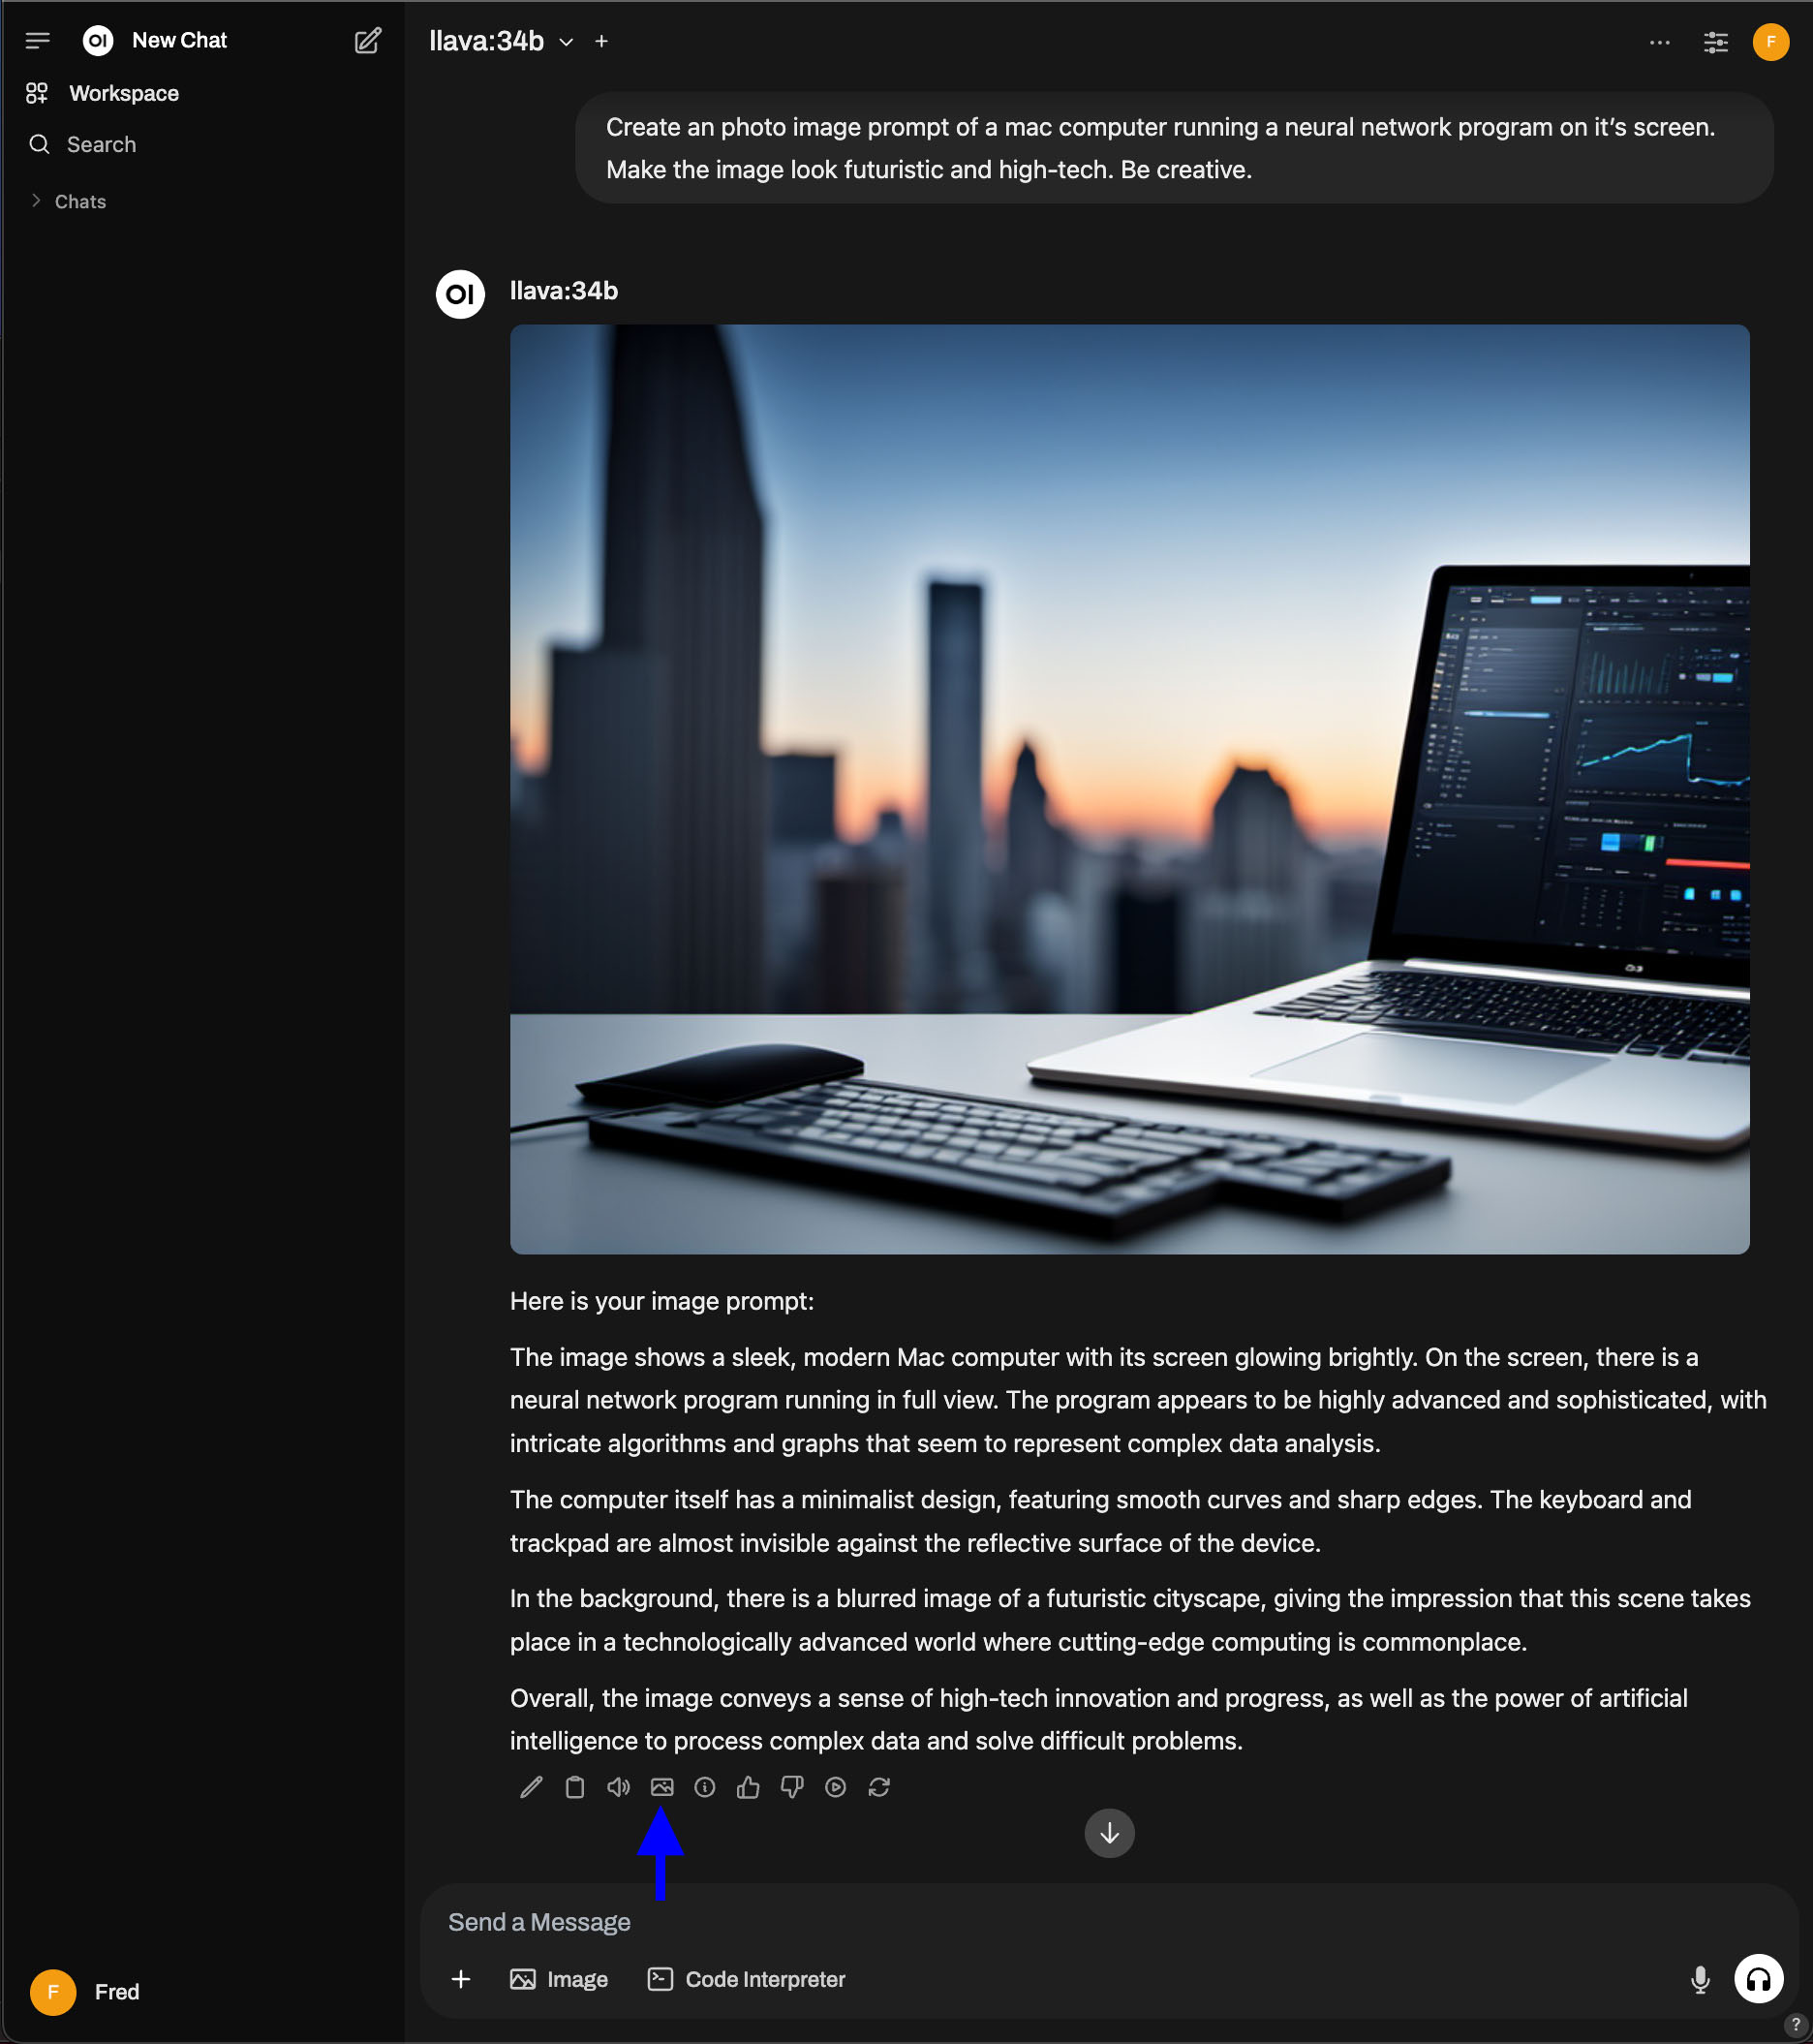
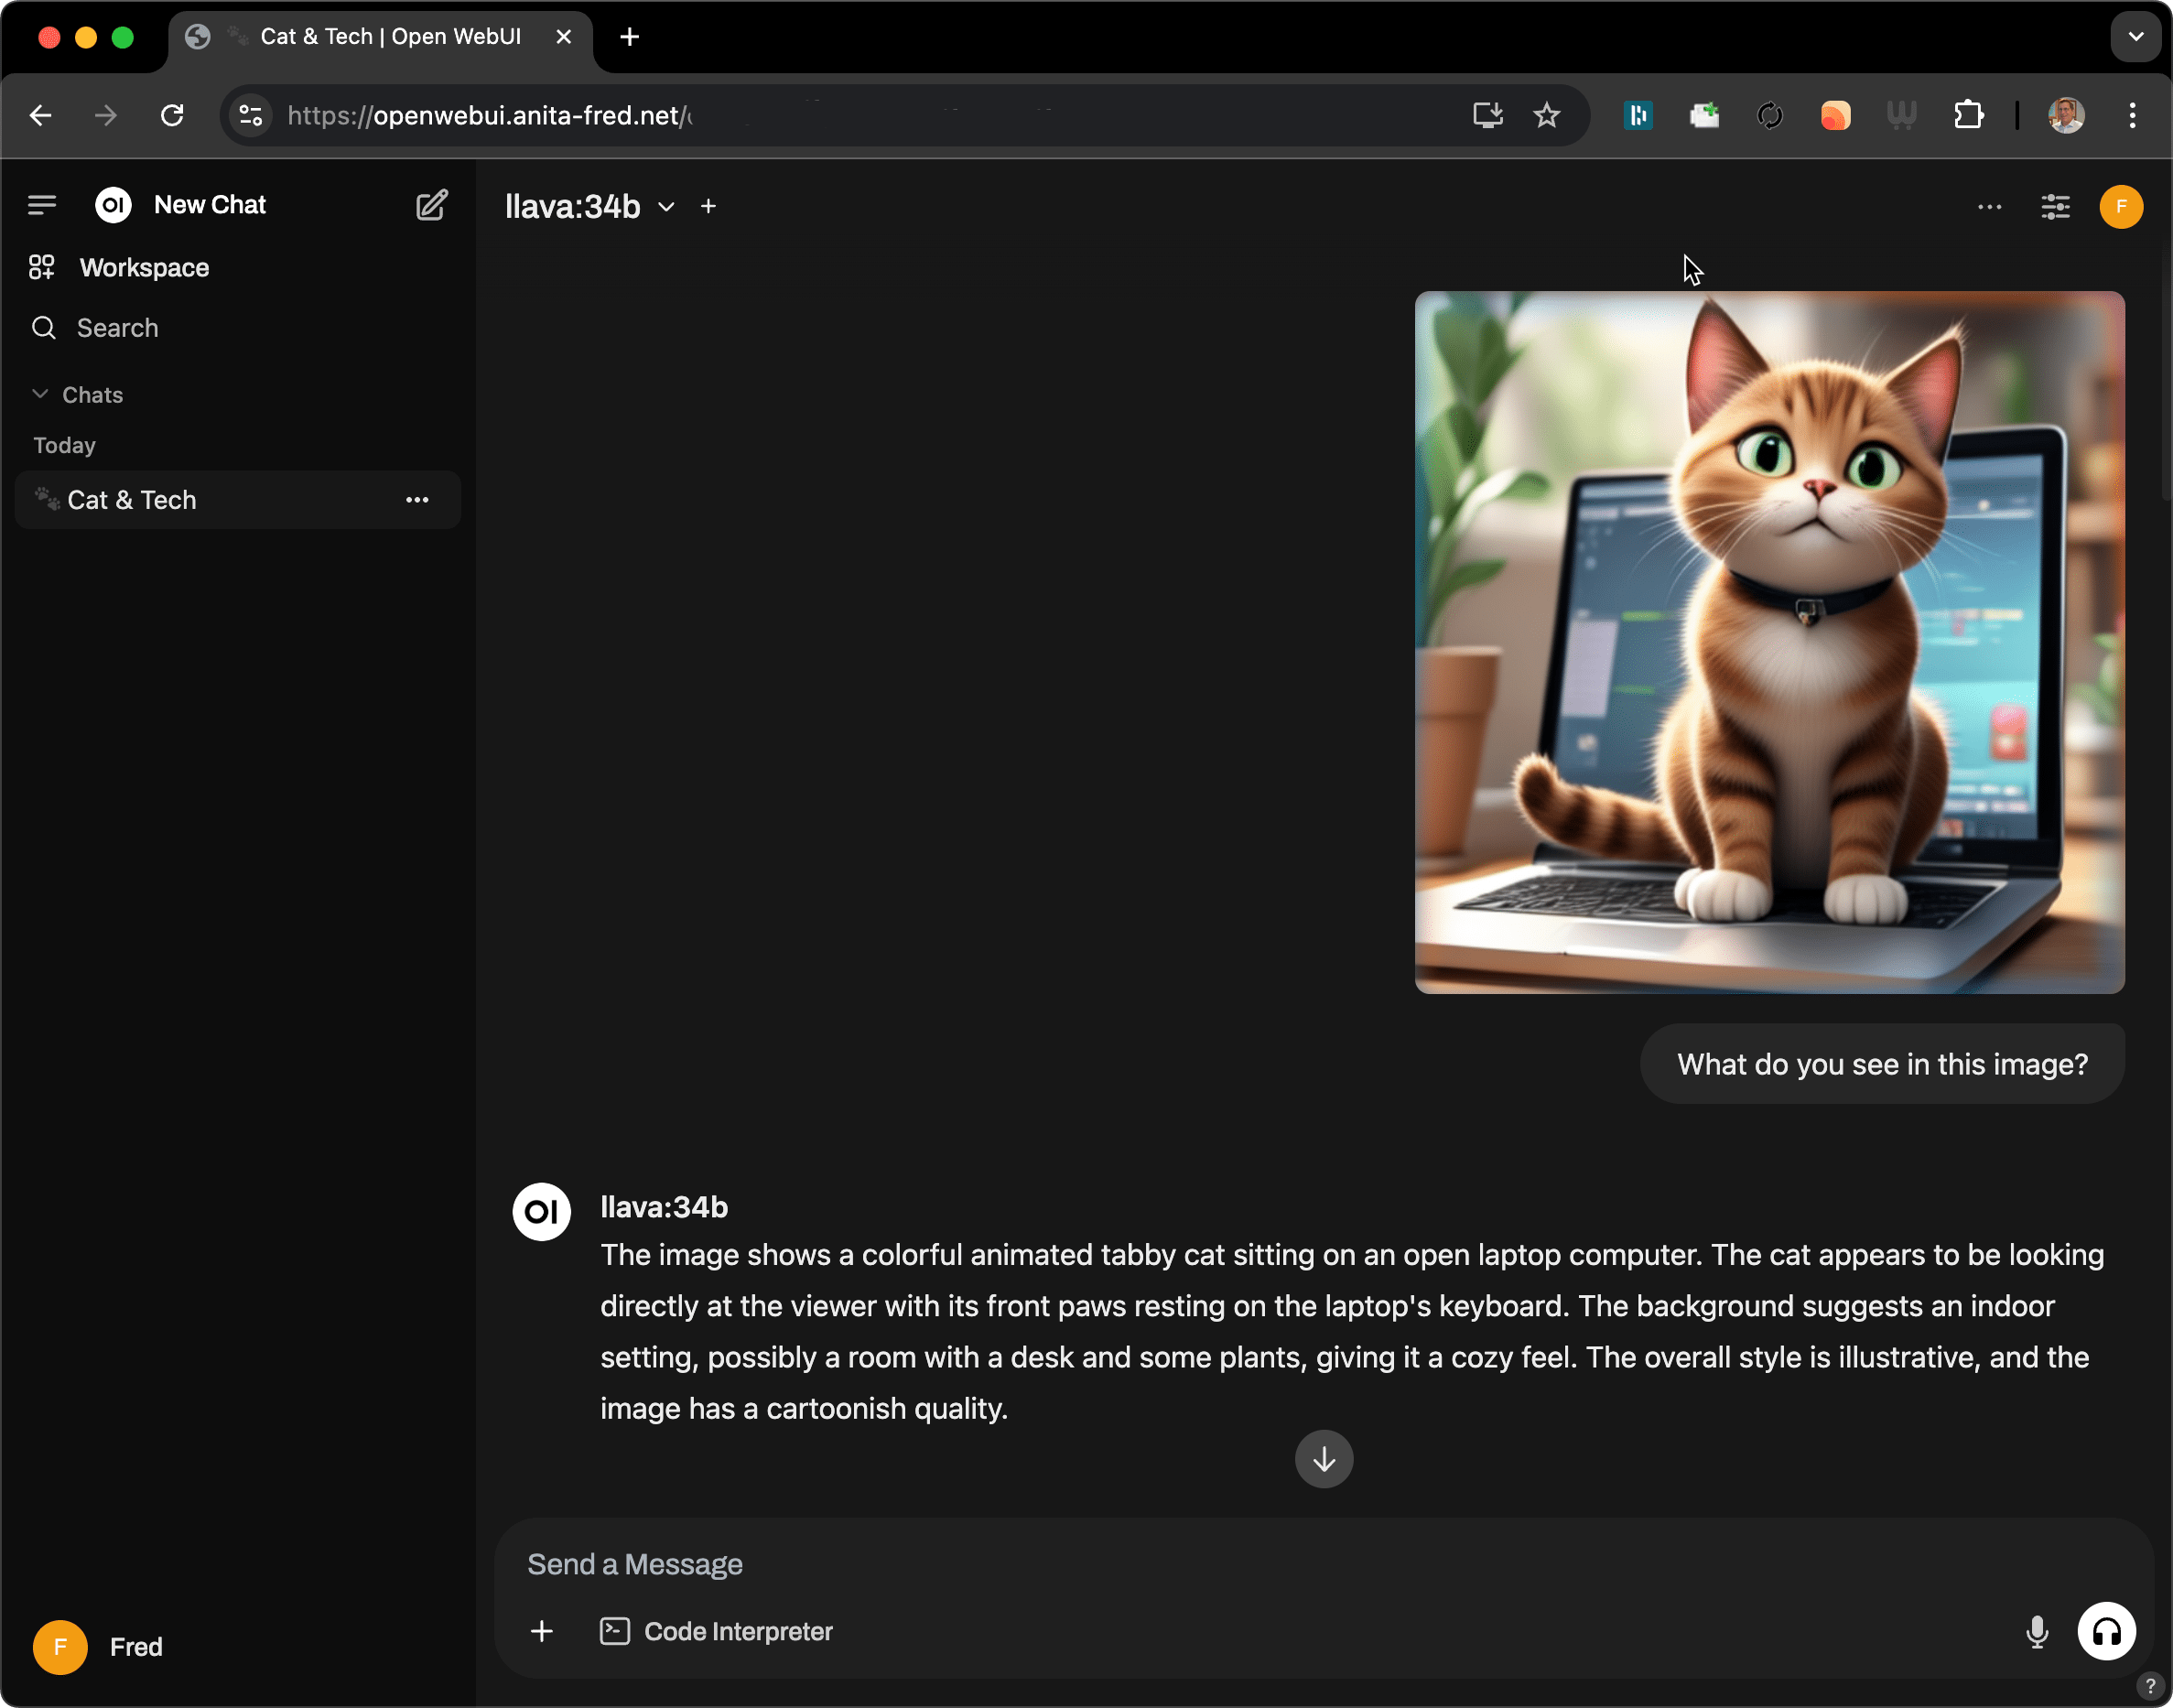
Open WebUI simplifies the process of embedding AI capabilities into web environments. It allows developers to create dynamic interfaces. Users can enter data, view AI-generated outputs, and visualize real-time results. Its open-source nature provides flexibility for customization, adapting to various AI project requirements, or integrating with popular machine learning libraries. (This summary was written, in part, using the deepseek-r1:32b model).
Open WebUI Installation
We installed Open WebUI as a Docker container using the approach outlined in the video below.
Encryption and reverse proxy implementation is handled using Traefik. A docker-compose template file for our installation follows. It can be installed as a Portainer stack.
Ollama is an open-source platform designed for training and deploying custom machine-learning models locally. It enables users to work without relying on cloud services. It supports various model architectures, offering flexibility for diverse applications. Ideal for researchers and developers seeking privacy and control over their data, it facilitates offline AI development and experimentation. (This paragraph was written using the deepseek-r1:32b model running on an Apple Mac Mini M4 Pro).
We will use Ollama as a core tool to experiment with Large Language Models running locally on our LLM Workstation.
Installing and Running the Tool
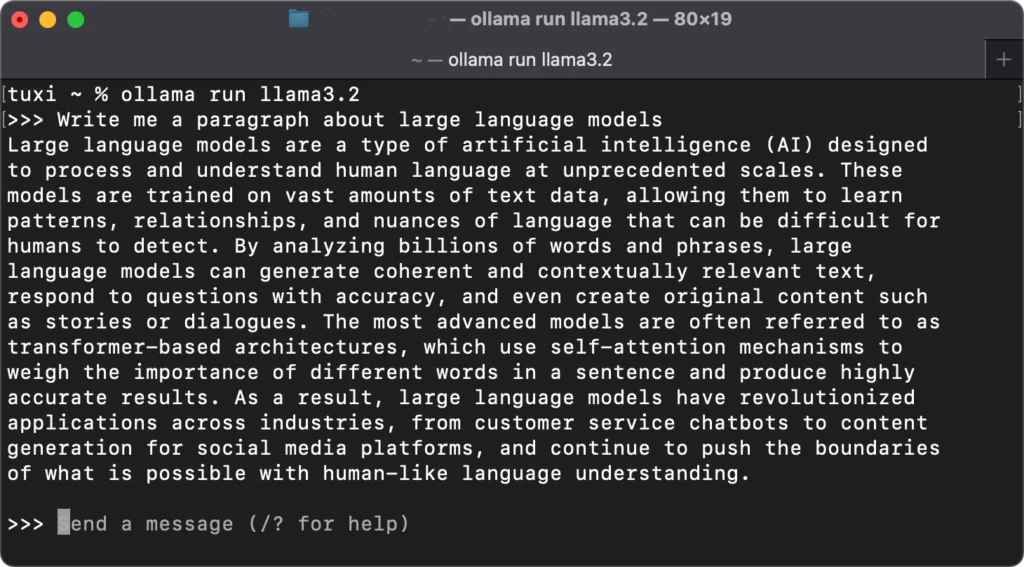
You can install Ollama by downloading and running the installer. Next, you can choose a model (ex. llama3.2) and execute the following command to install and run it.
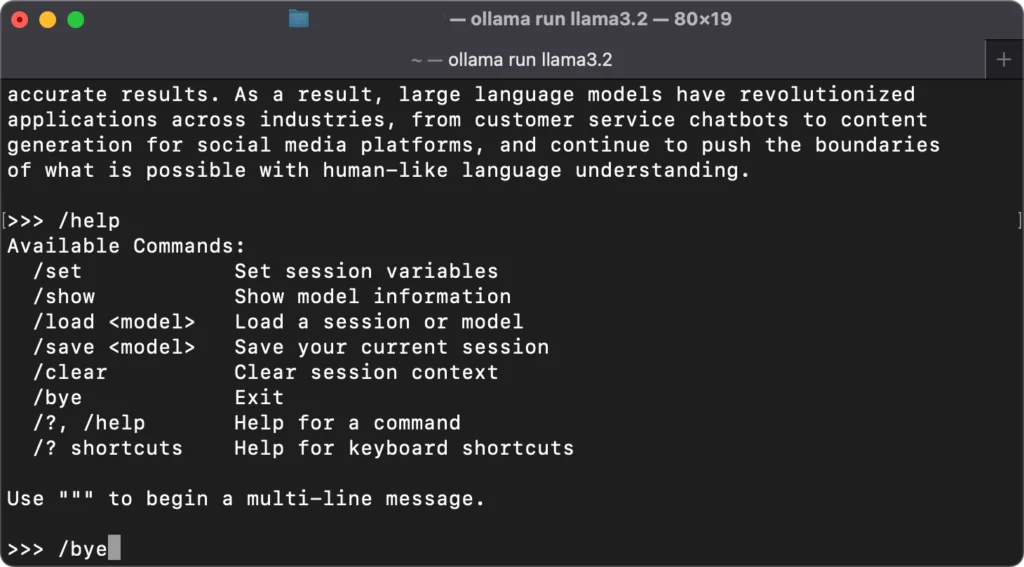
% ollama run llama3.2
We’ll ask the model to write a paragraph about large language models.
Commands to control the model process are entered by starting with a /. Here is a list of options.
Exposing Ollama on Our Network
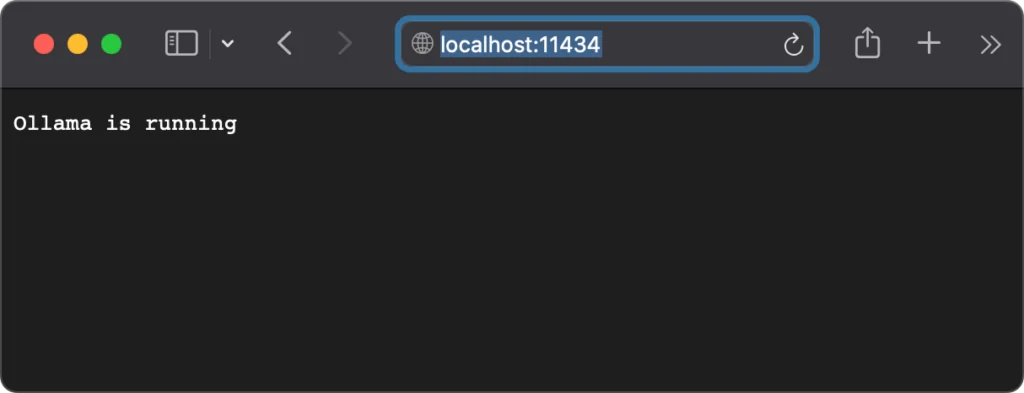
An API that enables applications to interact with or change the running model is available on http://localhost:11434. We want to make the API accessible across our network. We can create a plist to set the OLLAMA_HOST environment variable to “0.0.0.0:11434” to expose the API on our workstation’s IP interface. The list file should be created and saved in ~/Library/LaunchAgents. It is named com.ollama.plist. The plist’s contents are shown below.
XML
<?xml version="1.0" encoding="UTF-8"?><!DOCTYPEplist PUBLIC "-//Apple//DTD PLIST 1.0//EN" "http://www.apple.com/DTDs/PropertyList-1.0.dtd"><plistversion="1.0"><dict><key>Label</key><string>com.ollama</string><key>Program</key><string>/Applications/Ollama.app/Contents/MacOS/Ollama</string><key>EnvironmentVariables</key><dict><key>OLLAMA_HOST</key><string>0.0.0.0:11434</string></dict><key>RunAtLoad</key><true/><key>KeepAlive</key><true/></dict></plist>
Ollama com.ollama.plist contents
Finally, make sure that Ollama is stopped and run the following command. Then restart Ollama.
We are building a Large Language Model (LLM) workstation and server around a Mac Computer and Apple Silicon. My current machine is a Mac Mini M4 Pro. The specs for this machine are –
M4 Pro Chip
48 GB of Unified Memory
16 CPU Cores
20 GPU Cores
16-Core Neural Engine
2 TB SSD Storage
We have a new Mac Studio M3 Ultra coming. This upgrade should give us considerably more processing power for my LLM Workstation. The specs for the new machine are –
M3 Ultra Chip
512 GB of Unified Memory
32 CPU Cores
80 GPU Cores
32-Core Neural Engine
2 TB SSD Storage
5 TB external Thunderbolt 5 SSD Storage
The setup has a pair of Apple 5K Studio Displays. They allow me to use it as my primary desktop machine.
Our LLM Workstation is a good platform for learning about Artificial Intelligence and Machine Learning. It is also suitable for learning about Machine learning and our planned AI projects.
We will set up our Workstation to run LLMs continuously. We will expose these LLMs via our Home Network. A web (Open WebUI) interface will connect them to other computers and smart devices around our home. Our current Docker setup will be used for this purpose.