One of our Homelab environment’s goals is to run our Windows desktop OSs on virtual machines. This enables us to get at standard OS environments such as Microsoft Windows easily from a web browser.
Windows Virtual Machine Setup
We use the following procedure to set up our Windows VMs –
The following ISO images are downloaded to the PVE-templates Share on our Proxmox cluster –
Run on HS Services Network, use Intel E1000 NIC, set VLAN Tag to 10
Start the VM and install Windows. Some notes include –
Enter the Windows 10 Pro product key
Use the Windows Driver disk to load a driver for the disk
Once Windows is up, use Windows Driver disk to install drivers for devices that did not install automatically. You can find the correct driver by searching for drivers from the root of the Windows Driver disk.
Install the qemu guest agent from the Windows Driver disk. It’s in the guest agent directory.
Set the Computer name, Workgroup, and Domain name for the VM.
Do a Windows update and install all updates next.
Setup Windows applications as follows –
Install Chrome browser
Install Dashlane password manager
Install Dropbox and Synology Drive
Install Start10
Install Directory Opus File Manager
Install PDF Viewer
Install Printers
Install media tools, VLC Player, and QuickTime Player
Install Network utilities, WebSSH
Install windows gadgets
Install DXlab, tqsl, etc.
Install Microsoft Office and Outlook
Install SmartSDR
Install WSJT-X, JTDX, JTalert
Install PSTRotator, Amplifer app
Install RealVNC
Install Benchmarks (Disk, Graphics, Geekbench)
Install Folding at Home
Need a sound driver for audio (Windows Remote Desktop or RealVNC).
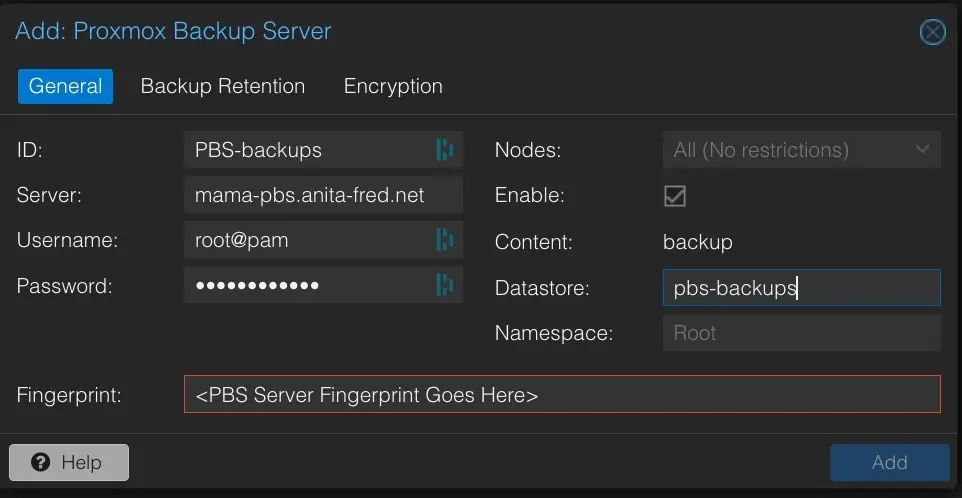
This page covers the installation of the Proxmox Backup Server (PBS) in our HomeLab. We run the PBS in a VM on our server and store backups in shared storage on one of our NAS drives.
Make the NAS share mount permanent by adding it to /etc/fstab
vi /etc/fstab
...after the last line add the following line
# Mount PBS backup store from NAS
//nas-#.anita-fred.net/PBS-backups /mnt/pbs-store cifs vers=3.0,credentials=/etc/samba/.smbcreds,uid=backup,gid=backup,defaults 0 0
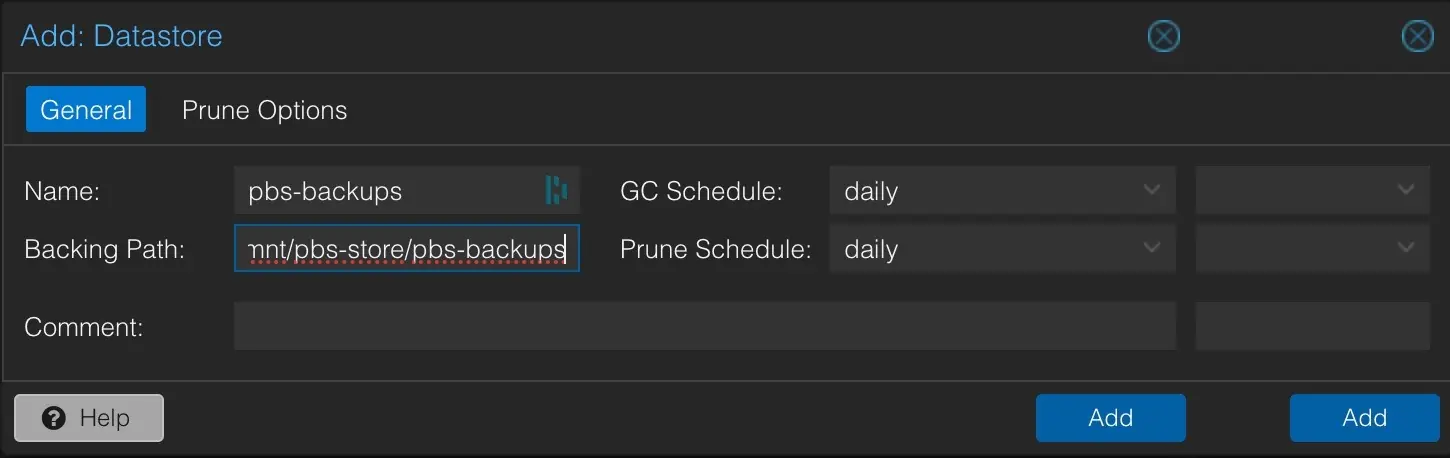
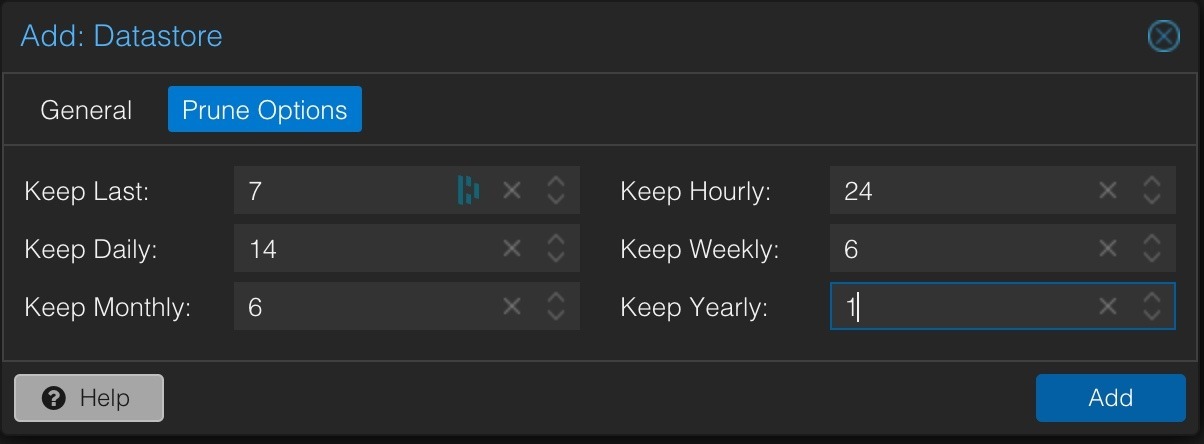
Create a datastore to hold the PBS backups in the Proxmox Backup Server as follows. The datastore will take some time to create (be patient).
The NFS share for the Proxmox Backup store needs time to start before the Backup server starts on boot. This can be set for each node under System/Options/Start on Boot delay. A 30-second delay seems to work well.
Setup Backup, Pruning, and Garbage Collection
The overall schedule for Proxmox backup operations is as follows:
02:00 – Run a PVE Backup on the PBS Backup Server VM from our Production Cluster (run in suspend mode; stop mode causes problems)
02:30 – Run PBS Backups in all Clusters/Nodes on all VMs and LXCs EXCEPT for the PBS Backup Server VM
03:00 – Run Pruning on the all PBS datastores
03:30 – Run Garage Collection on all PBS datastores
05:00 – Verify all backups in all PBS G
Local NTP Servers
We want Proxmox and Proxmox Backup Server to use our local NTP servers for time synchronization. To do this, modify/etc/chrony/chrony.conf to use our servers for the pool. This must be done on each server individually and inside the Proxmox Backup Server VM. See the following page for details.
Backup Temp Directory
Proxmox backups use vzdump to create compressed backups. By default, backups use /var/tmp, which lives on the boot drive of each node in a Proxmox Cluster. To ensure adequate space for vzdump and reduce the load on each server’s boot drive, we have configured a temp directory on the local ZFS file systems on each of our Proxmox servers. The tmp directory configuration needs to be done on each node in the cluster (details here). The steps to set this up are as follows:
# Create a tmp directory on local node ZFS stores
# (do this once for each server in the cluster)
cd /zfsa
mkdir tmp

# Turn on and verify ACL for ZFSA store
zfs get acltype zfsa
zfs set acltype=posixacl zfsa
zfs get acltype zfsa

# Configure vzdump to use the ZFS tmp dir'
# add/set tmpdir as follows
# (do on each server)
cd /etc
vi vzdump.conf
tmpdir: /zfsa/tmp
:wq
This page covers the Proxmox VE install and setup on our server. You can find a great deal of information about Proxmox in the Proxmox VE Administrator’s Guide.
Proxmox Installation/ZFS Storage
Proxmox was installed on our server using the steps in the following video:
The Proxmox boot images are installed on MVMe drives (ZFS RAID1 on our Dell Sever BOSS Card, or ZFS single on the MNVe drives on our Supermicro Servers). This video also covers the creation of a ZFS storage pool and filesystem. A single filesystem called zfsa was set up using RAID10 and lz4 compression using four SSD disks on each server.
I like to install a few additional tools to help me manage our Proxmox installations. They include the nslookup and ifconfig commands and the tmux terminal multiplexor. The commands to install these tools are found here.
Cluster Creation
With these steps done, we can create a 3-node cluster. See our Cluster page for details.
ZFS Snapshots
Creating ZFS snapshots of the Proxmox installation can be useful before making changes. This enables rollback to a previous version of the filesystem should any changes need to be undone. Here are some useful commands for this purpose:
zfs list -t snapshot
zfs list
zfs snapshot rpool/ROOT/<node-name>@<snap-name>
zfs rollback rpool/ROOT/<node-name>t@<snap-name>
zfs destroy rpool/ROOT/<node-name>@<snap-name>
Be careful to select the proper dataset – snapshots on the pool that contain the dataset don’t support this use case. Also, you can only roll back to the latest snapshot directly. If you want to roll back to an earlier snapshot, you must first destroy all of the later snapshots.
In the case of a Proxmox cluster node, the shared files in the associated cluster filesystem will not be included in the snapshot. You can learn more about the Proxmox cluster file system and its shared files here.
You can view all of the snapshots inside the invisible /.zfs directory on the host filesystem as follows:
# cd /.zfs/snapshot/<name>
# ls -la
Local NTP Servers
We want Proxmox and Proxmox Backup Server to use our local NTP servers for time synchronization. To do this, we need to modify /etc/chrony/chrony.conf to use our servers for the pool. This needs to be done on each server individually and inside the Proxmox Backup Server VM. See the following page for details.
The first step before following the configuration procedures above is to install chrony on each node –
apt install chrony
Mail Forwarding
We used the following procedure to configure postfix to support forwarding e-mail through smtp2go. Postfix does not seem to work with passwords containing a $ sign. A separate login was set up in smtp2go for forwarding purposes.
Some key steps in the process include:
# Install postfix and the supporting modules
# for smtp2go forwarding
sudo apt-get install postfix
sudo apt-get install libsasl2-modules

# Install mailx
sudo apt -y install bsd-mailx
sudo apt -y install mailutils

# Run this command to configure postfix
# per the procedure above
sudo dpkg-reconfigure postfix

# Use a working prototype of main.cf to edit
sudo vi /etc/postfix/main.cf

# Setup /etc/mailname -
#   use version from working server
#   MAKE SURE mailname is lower case/matches DNS
sudo uname -n > /etc/mailname

# Restart postfix
sudo systemctl reload postfix
sudo service postfix restart

# Reboot may be needed
sudo reboot

# Test
echo "Test" | mailx -s "PVE email" <email addr>
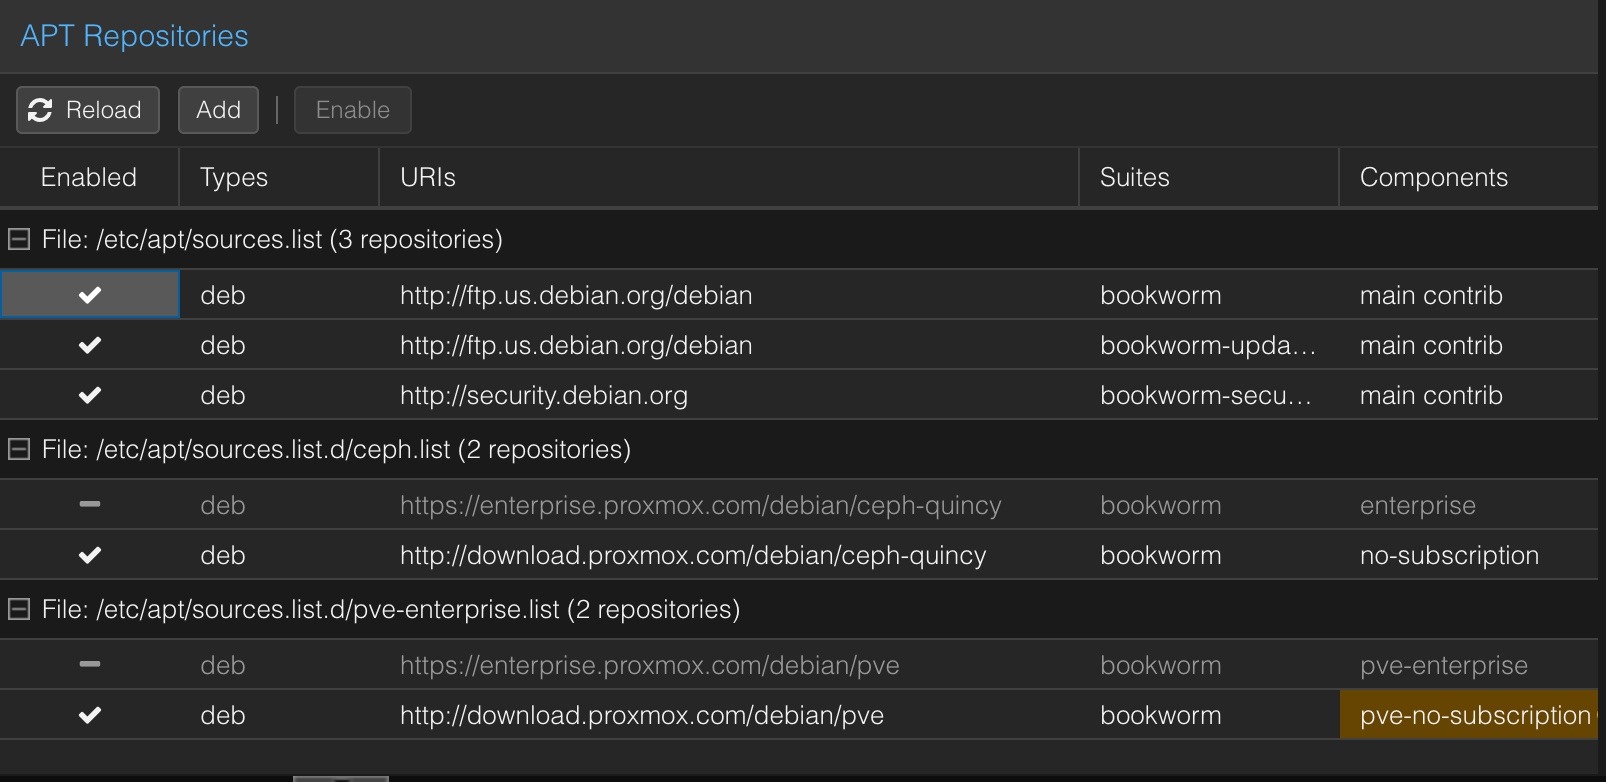
Disabling Enterprise Repository
Proxmox No Subscription Repositories
We recommend purchasing at least a Community Support License for production Proxmox servers. We are running some test servers here and we have chosen to use the No Subscription repositories for these systems. The following videos explain how to configure the No Subscription repositories. These procedures work with Proxmox 8.3.
I have occasionally encountered issues with SSH keys becoming outdated on our servers. The solution is to run the following commands on all servers. A reboot is also sometimes necessary.
# Update certs and repload PVE proxy
pvecm updatecerts -F && systemctl restart pvedaemon pveproxy

# Reboot if needed
reboot
DNS Performance Improvements
Some proxmox components can do DNS lookups at high rates. Some things that help with this include:
Using IP addresses instead of DNS names for NFS shares in /etc/pv/storage.cfg
Setting high-use DNS names like ‘pbs.your-domain‘ in /etc/hosts (you’ll need to do this for each node in your cluster)
If you use the Metrics Server feature in Datacenter, you’ll want to use an IP address instead of a DNS name to access your metrics database.